Psst! Looking for more? Check out the Tronxy P802M page with links to other articles about modifying and improving the Tronxy P802M 3D printer.
In an attempt to improve the stiffness of the Tronxy P802M 3D printer along the x axis I printed a pair of corner supports I found on Thingiverse. As I half expected this did not increase the frame stiffness so I decided to take more aggressive measures.
I found a section of 3/4″ aluminum U channel that had been purchased a few years ago from the home improvement hardware chain. I cut this to two 1ft lengths and added a bolt hole on each end. Then positioning the U channel on the printer to use it as a drill guide I added mounting holes in the acrylic frame. This improved the stiffness of the frame along the x-axis nicely and it seems like by using U channel I also improved the stiffness along the y-axis. This is a simple modification that works, I would not recommend wasting filament and time printing any of the supports found on Thingiverse. A 3ft section of U channel costs about $18 on Amazon but maybe cheaper elsewhere. A section of flat stock, L bracket, or even wood should produce similar results if the price of U channel is to steep.


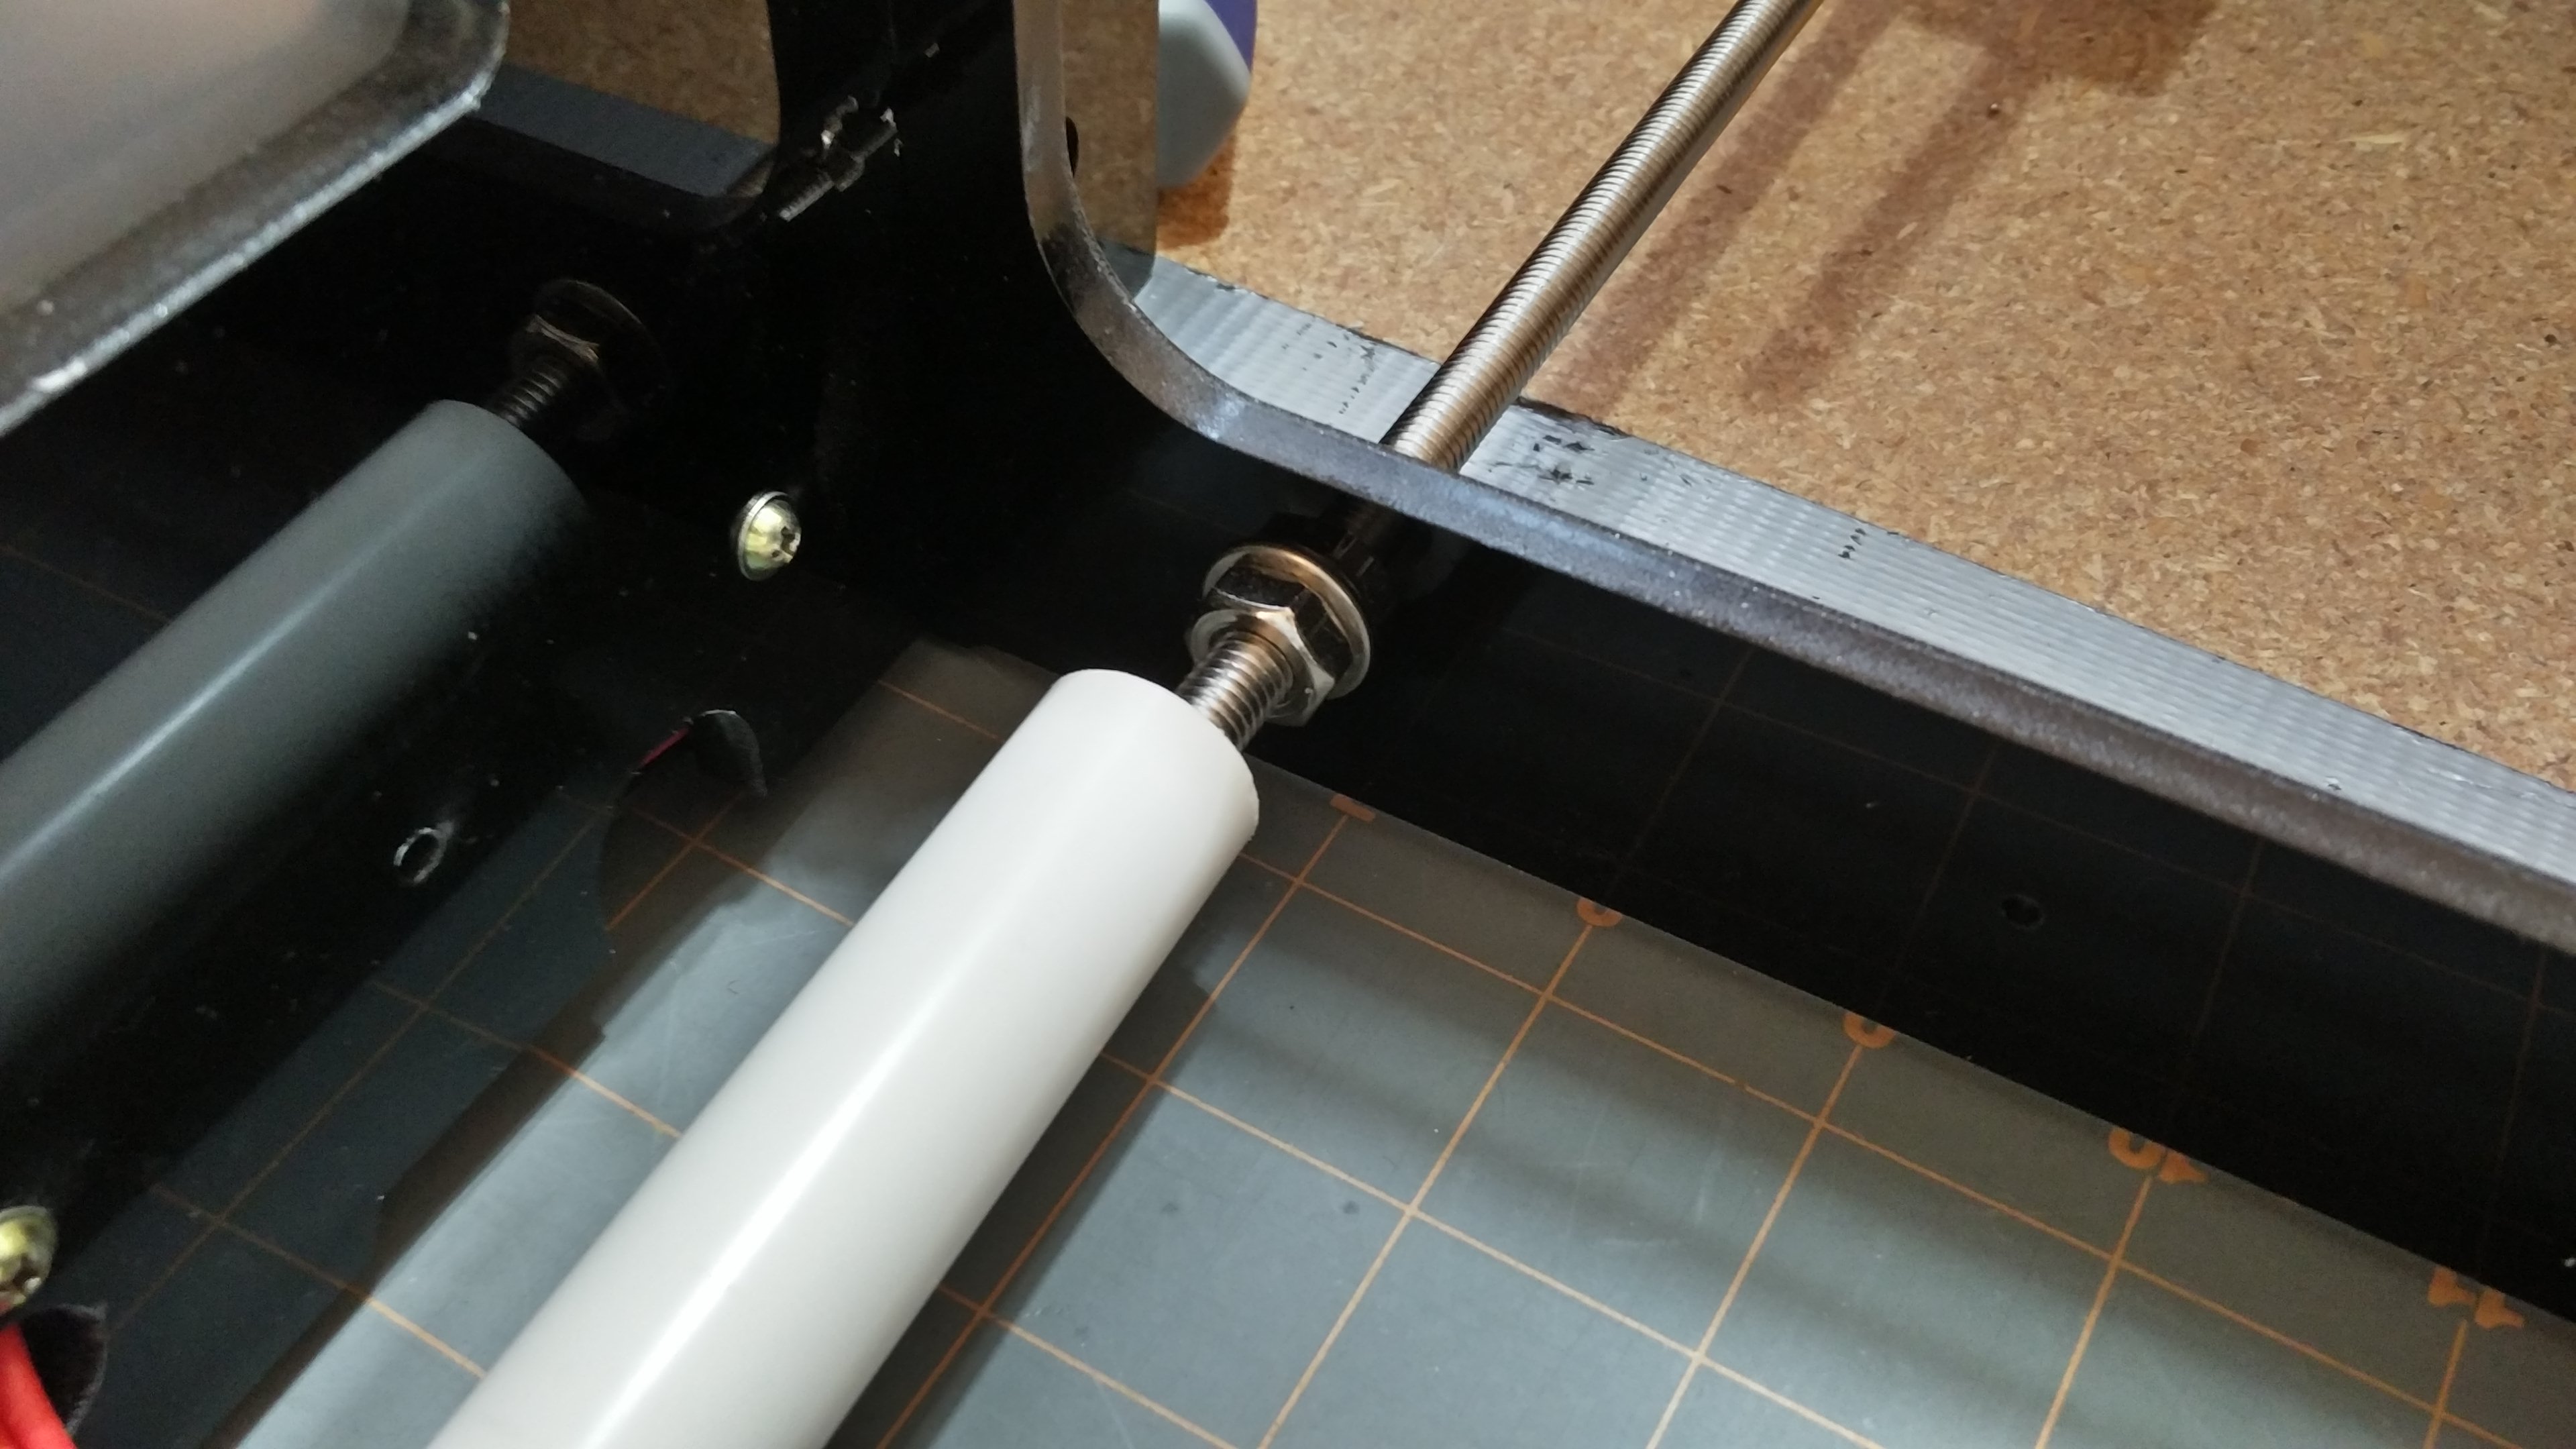
Before installing the U channel I also installed spacers for the two threaded rods that hold the y-axis together on the bottom of the frame. I noticed that the acrylic piece in the back (that also mounts the y stepper) was being pulled into the center of the printer so I used 1/2″ PVC pipe as spacers. The threaded rod is suppose to prevent this but I was having issues getting the nuts to line up just perfectly, with the spacers there is no need to align the nuts on the inside perfectly. I left the nuts and washers on the inside to support the PVC pipe centered on the threaded rod, surprisingly the ID of 1/2″ PVC pipe is about the same diameter as the nuts.
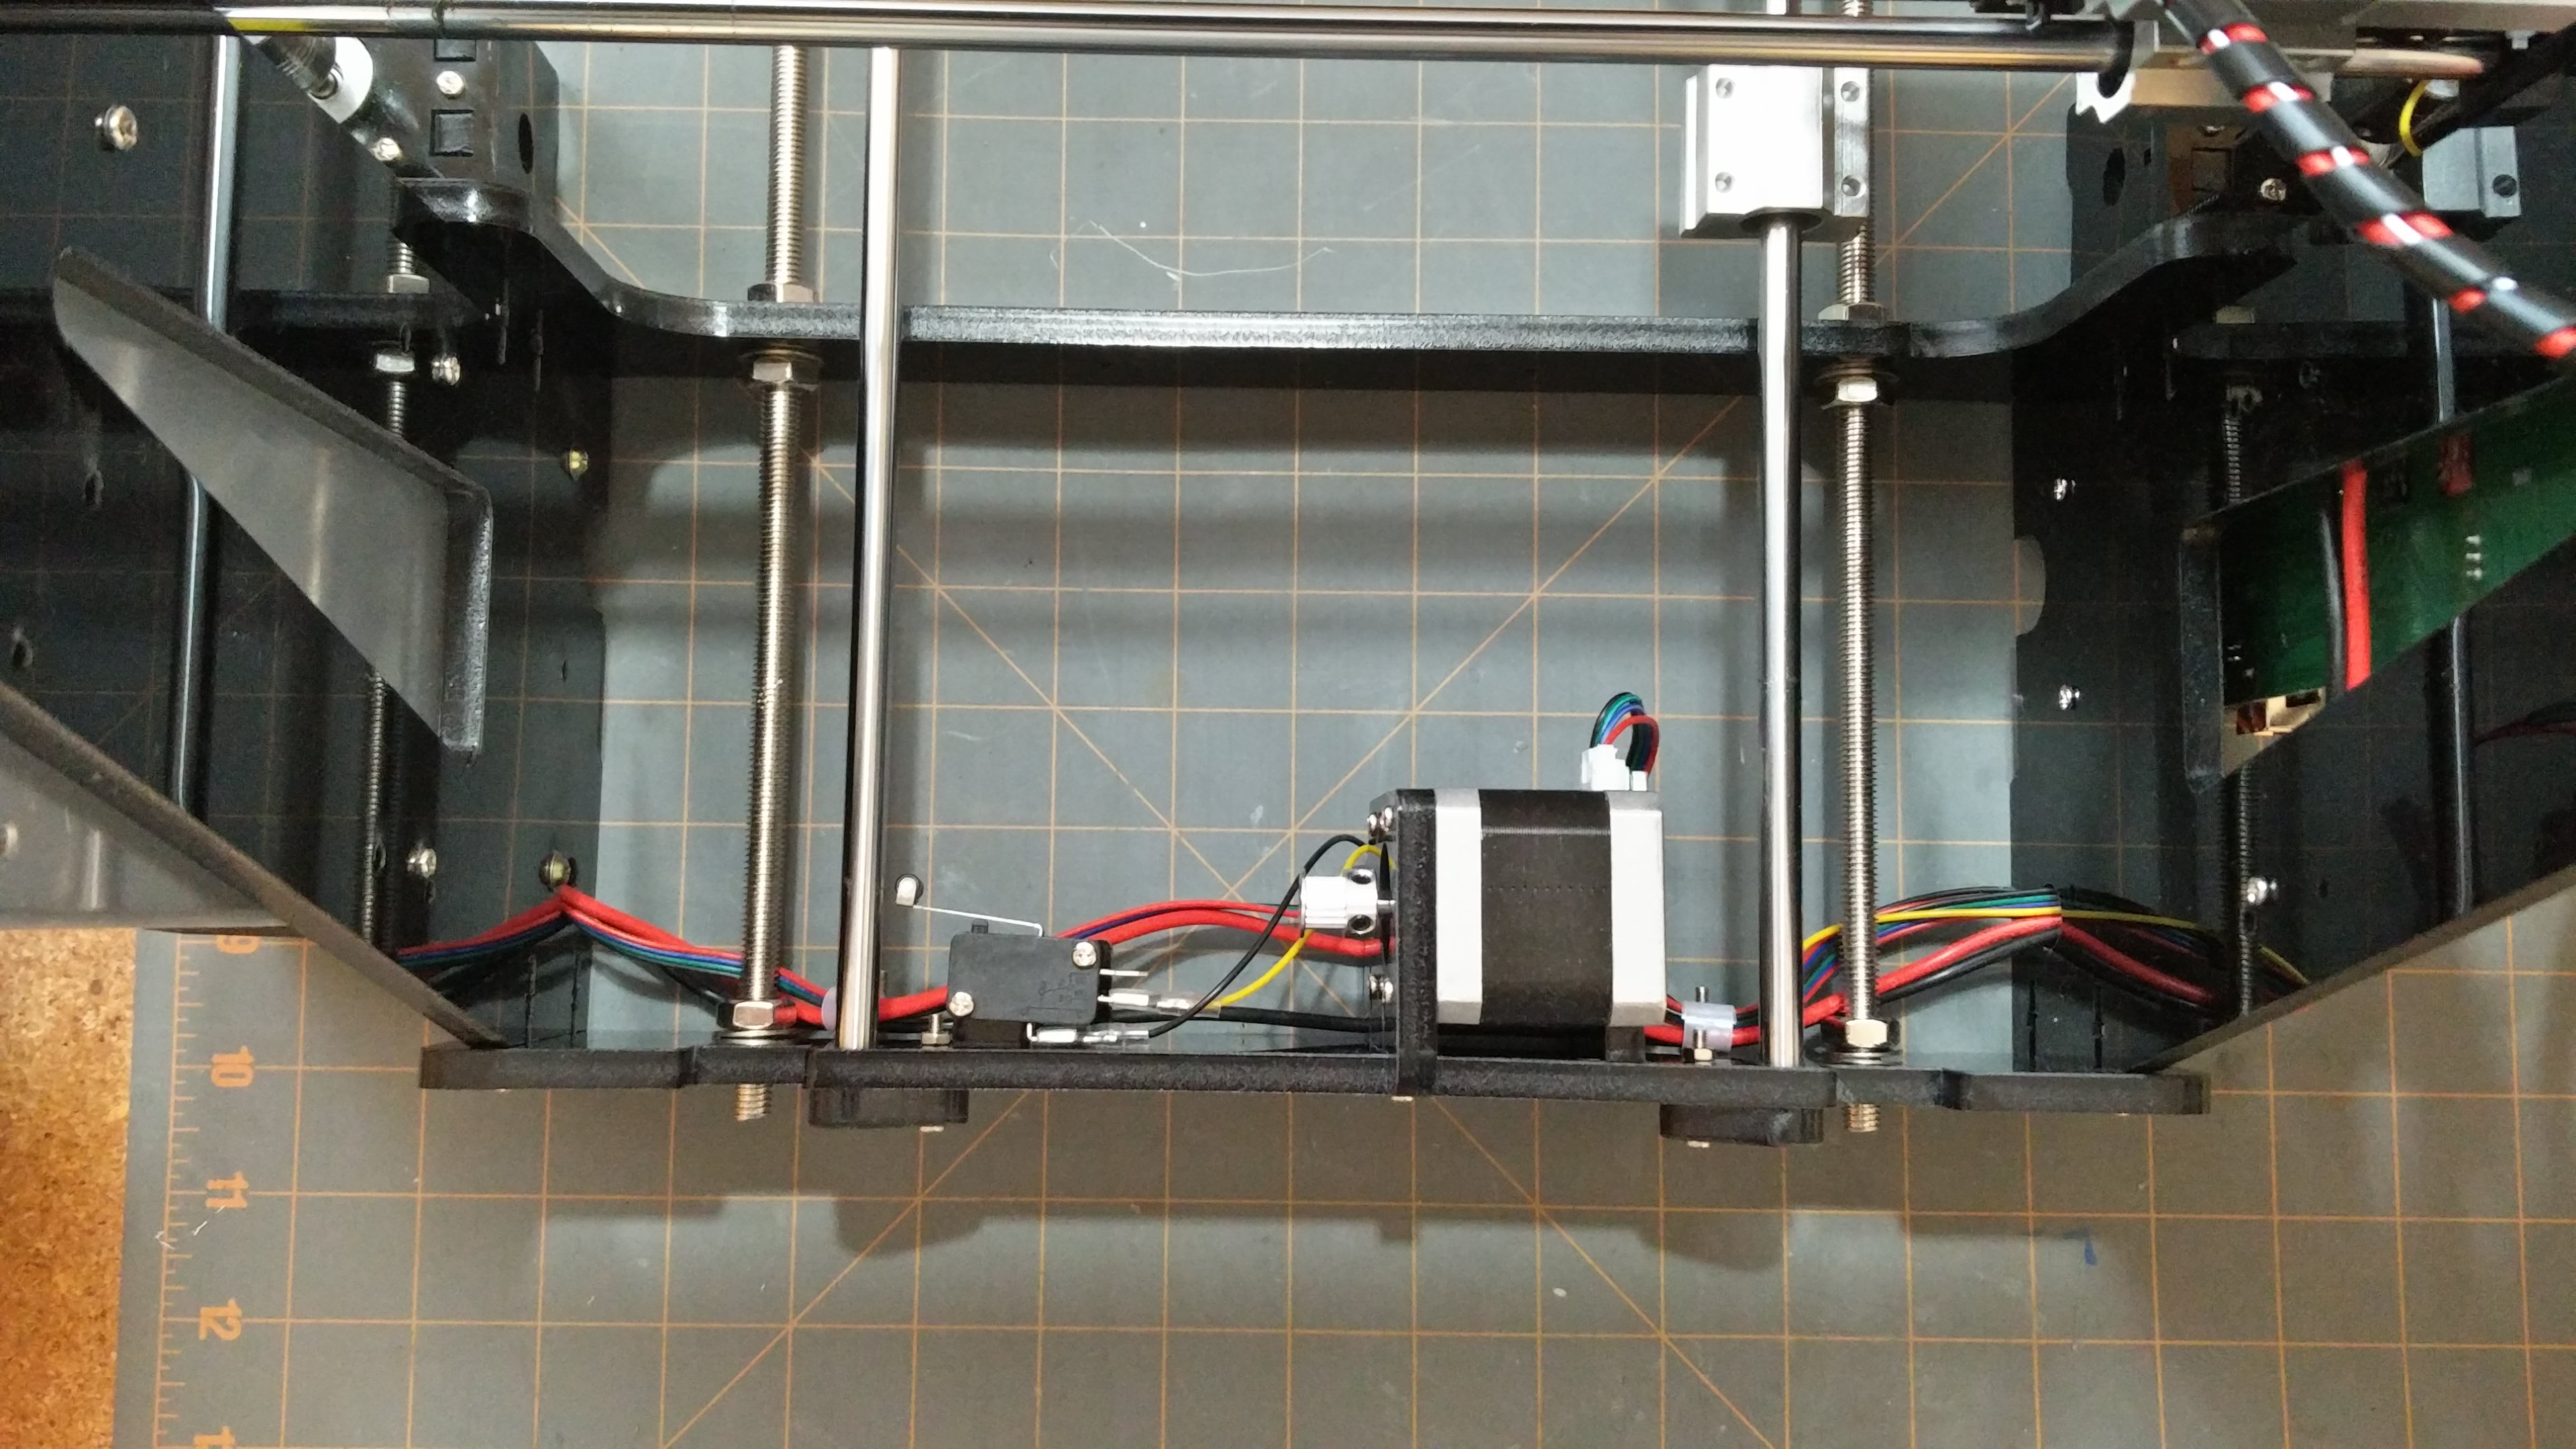

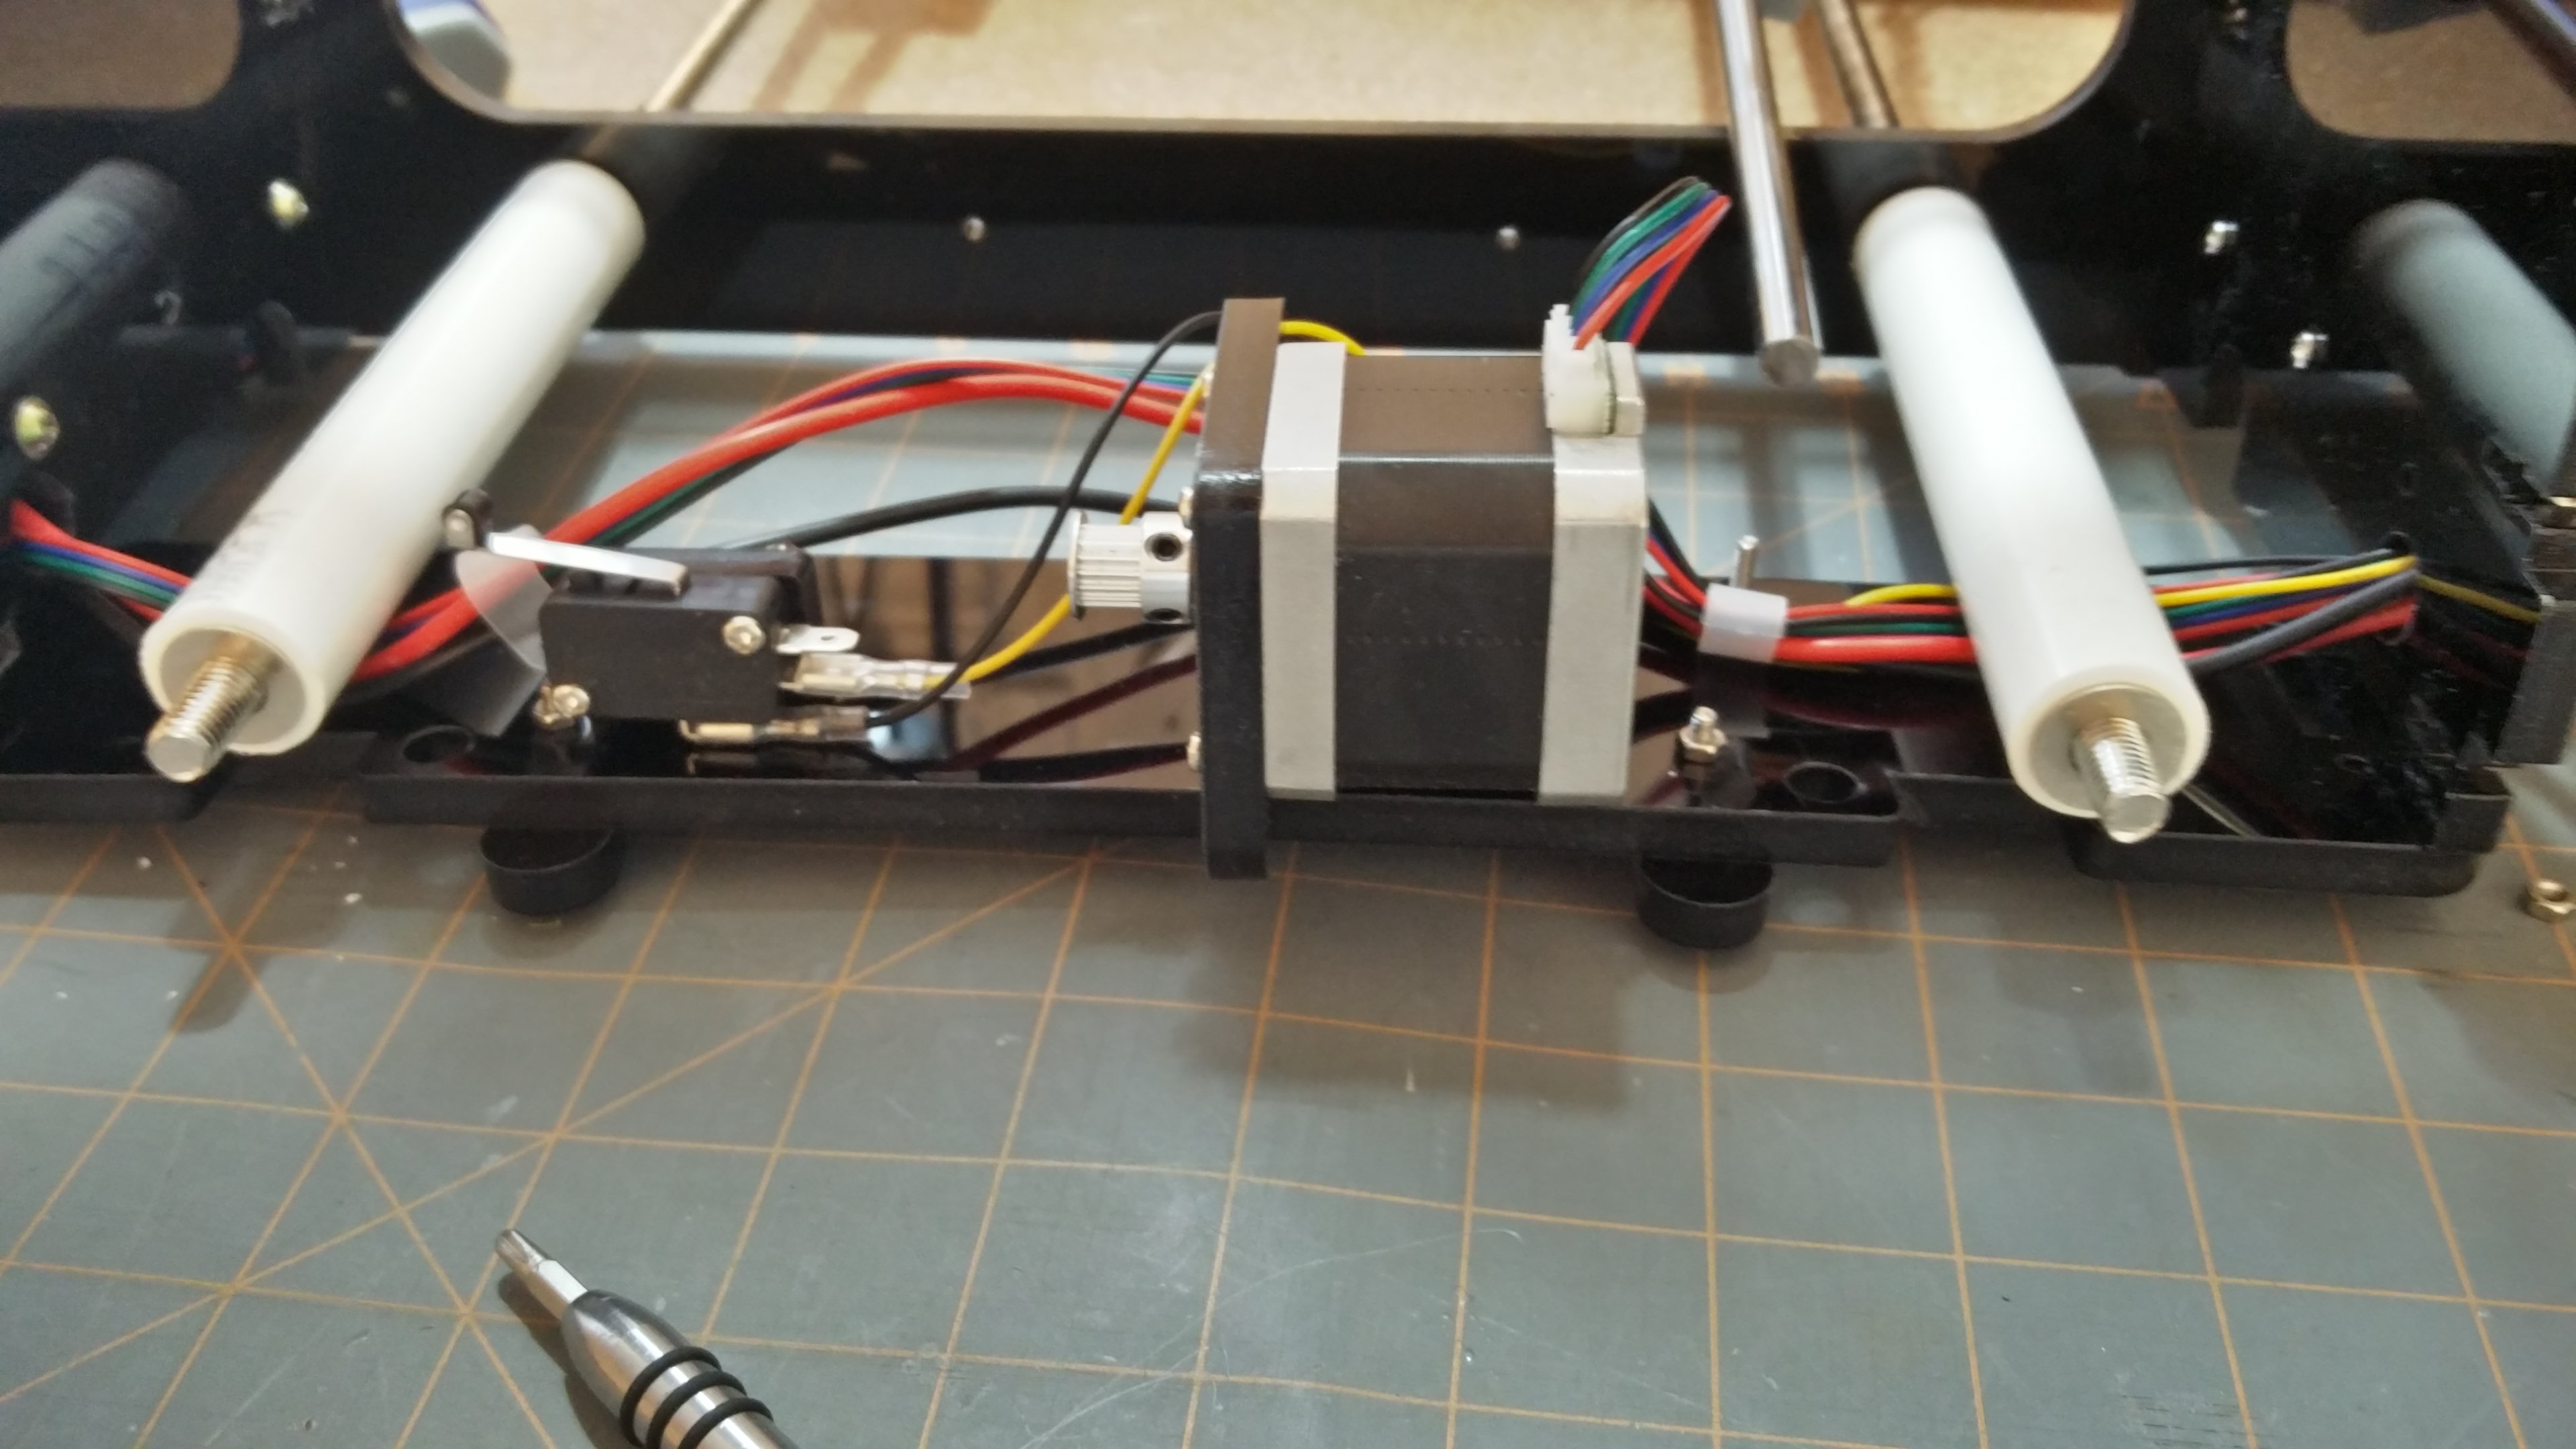

I also noticed that the guide rods for the y-axis were loose in the acrylic holes so I added shims in the form of Kapton tape to snug the rods in the holes better.
These few modifications have greatly increased the stiffness of the frame and have reduced surface issues that was caused by vibrations.

View Other Related Tronxy P802M Articles.
