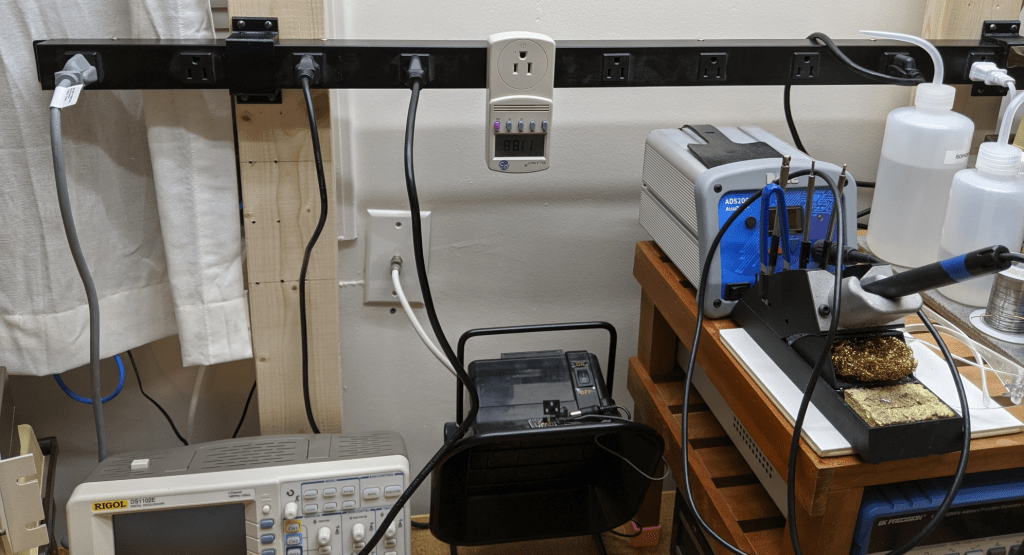
For troubleshooting and repair it is sometimes advantageous to be able to measure the power being consumed by a device from the AC outlet. For that I have been using a Kill A Watt but since it plugs directly into the socket without a cord it becomes awkward to use on the bench. I had considered a Hopi meter or something similar before stumbling upon the MPM-1010 Digital Power Meter.
Where to Buy
I have found two sources to buy the MPM-1010 from, Amazon and AliExpress. I was able to buy my unit from the Amazon link but at the time of writing this it is now out of stock. Buying it from Amazon cost the same amount as from AliExpress and saved me shipping costs so if you can get it from Amazon that is the better deal. I purchased my meter for $80USD. Ordering from AliExpress is $80 + $57 shipping to the US.
Specs
Below is a table of the specs directly from the user manual, I will do a quick and dirty spot check later on in this article to see if they are true.
| Function | Range | Accuracy |
|---|---|---|
| RMS Voltage | 1.00 – 300.0 Vrms | ±(0.4% reading + 0.1% range + 3 counts) |
| RMS Current | 0.001 – 10 Arms | ±(0.4% reading + 0.1% range + 3 counts) |
| Peak Current | 0.001 – 12 A | ±(0.4% reading + 0.1% range + 3 counts) |
| Power | 0.01 – 3000 W | ±(0.4% reading + 0.1% range + 3 counts) |
| Frequency | 16 – 650 Hz | ±0.5Hz |
| Power Factor | 0.000 – 1.000 | ±(0.004 + 0.001/reading + 3 counts) |
Compare this to the Kill A Watt model I have, the P4400.
| Function | Range | Accuracy, Typical | Accuracy, Max |
|---|---|---|---|
| RMS Voltage | 85 – 125 Vrms | 0.2% | 1% |
| RMS Current | 0.00 – 15.00 Arms | 0.3% | 1% |
| Power, Active | 0 – 1875 W | 0.5% | 2% |
| Power, Apparent | 0 – 1875 VA | 0.5% | 2% |
| Frequency | 47.0 – 63 Hz | 0.1Hz | 2% |
| Power Factor | 0.00 – 1.00 | 0.01 | 0.03 |
The MPM-1010 is more accurate if we take the worst case accuracy values of the Kill A Watt in all measurement functions. The MPM-1010 has a far greater range since it can be used not only for 120Vac loads where as the Kill A Watt is a device that has been optimized for North American use with 120Vac devices. So along with a form factor better suited for an electronics bench the MPM-1010 is a better device at a little over 2.3x the cost of a consumer grade meter.
What is in the box?
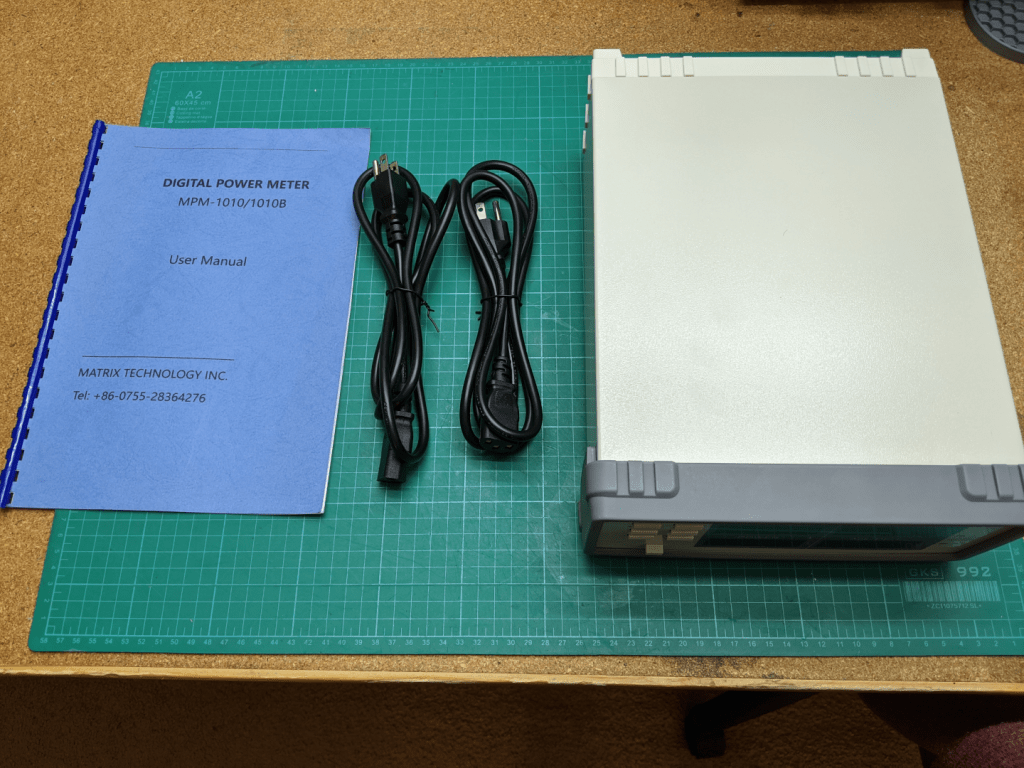
Again I am not sure how it will be packaged from AliExpress but my unit from Amazon came nicely packaged inside a thick box fit for international travel with foam inserts to prevent damage.

Since I ordered my unit from Amazon I cannot be sure that a unit ordered from AliExpress will include the same items but included in the box was the MPM-1010, a printed and spiral bound 9 page user manual, and two 5 foot IEC power cords. The power cords seem good enough for light to normal loads and claim to use 0.75mm2 wire but for the full load of this instrument I would be sure to get a power cord suited to carry the current. The instrument itself draws less then 3W so the cord that comes with it should be sufficient for all cases.
External Overview
The case is mostly bent steel that is sufficiently thick at 1.2mm and does not feel paper thin. The front panel while not of high quality plastic and rubber is better then expected for the price. The back panel is a 1.4mm thick plate of aluminum with a plastic outer bumper. The unit measures roughly 365mm deep, 220mm wide, and 100mm tall including the feet. The case is super impressive and great for the price, some higher quality plastic on the back bumper and it would feel like a name brand instrument.
Front Panel
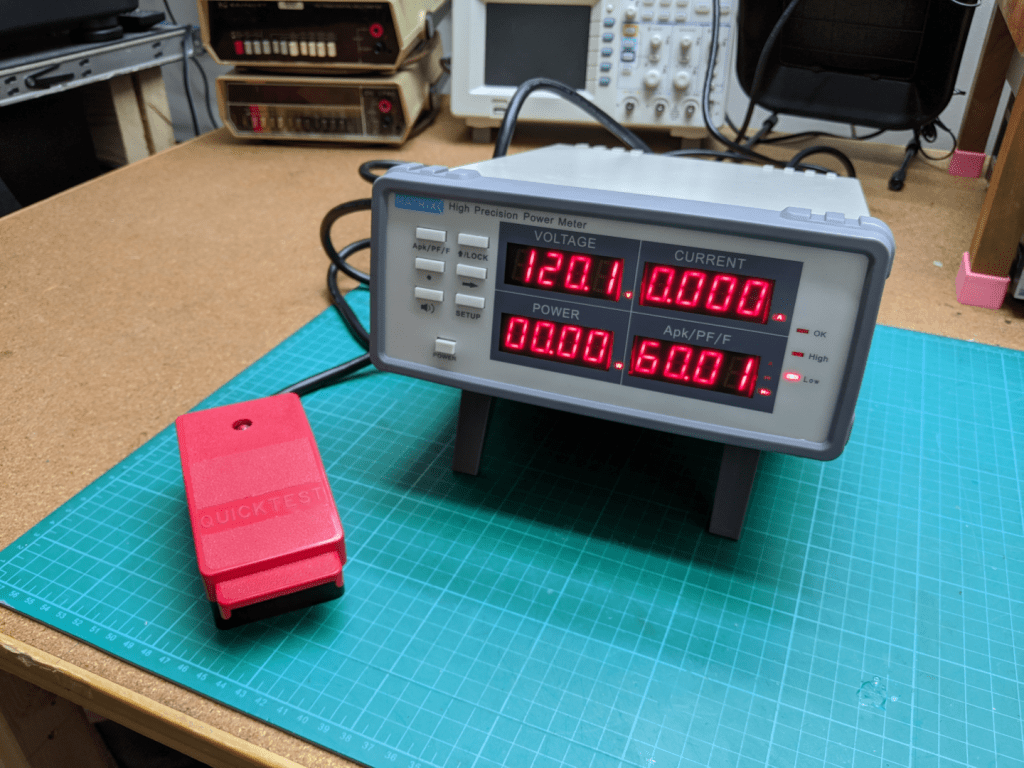
The front panel includes a set of four 4 digit 7 segment red LED displays. Three of the displays show voltage, current, and power. The forth display is multipurpose for displaying peak current, power factor, and frequency and is selected by pressing the Apk/PF/F button. A set of three LEDs on the right of this display indicates the current measurement being displayed on this forth display.

The power button is a big clonking switch that cuts power to the measurement unit instead of a soft power switch. The power switch does not cut power to the load. A power switch for the load would have been a great addition, maybe a future upgrade.
The six buttons enable the user to select the measurement displayed on the lower right display and also enter the setup menu to set lower and upper limits on current, power, and power factor. It does not appear that it is possible to set limits on voltage, peak current, and frequency. Three LEDs on the far right of the display indicates if a measurement is OK, Low, or High. There is also an internal buzzer that will sound and is easily silenced by the button with the speaker symbol. This makes me think this instrument is targeted towards factories and production lines.
The manual goes over setting these limits but the translation is a little spotty. It is super easy. Pressing the SETUP button selects first the lower current limit and this can be adjusted using the ↑/LOCK button or the ⚫ button. Pressing the SETUP button again goes to the high current limit and again is set using the same buttons. Pressing the setup button again will cycle to the power lower limit, then the power upper limit and finally the power factor lower and upper limits. These settings are saved in nonvolatile memory so they are not lost when the unit is unplugged.
Also of note with the front panel is the adjustable front feet that angle the unit for easy viewing by increasing the front height by about 70mm, a nice touch when it is sitting on a table below the user.
Back Panel
The back panel features two fused IEC power entry ports. The left port in the photo below labeled AC SOURCE powers the load to be measured and has a 10A fuse. The right port is for powering the meter and has a 0.3A fuse. Using 2 separate power inputs allows the unit to be used to measure AC sources other then the wall power. A 115V/220V selector switch below this input allows the unit to be used universally. The load is connected to the unit through the center universal AC socket. There is a sticker covering a cutout for a RS-232 DSUB connector that is a optional add-on. I think the much more expensive (>$560) MPM-1010B model has this feature but as you will see later on it may be possible to populate the PCB and upgrade to this function.
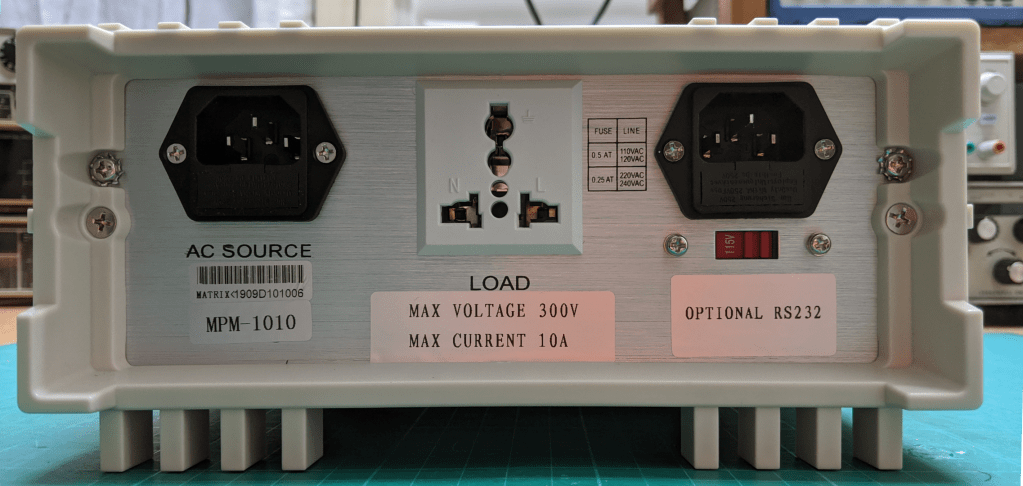
Also of note on the exterior of this unit is a carry handle on the right side for easy transportation to all your AC measurement parties.
Internal Overview
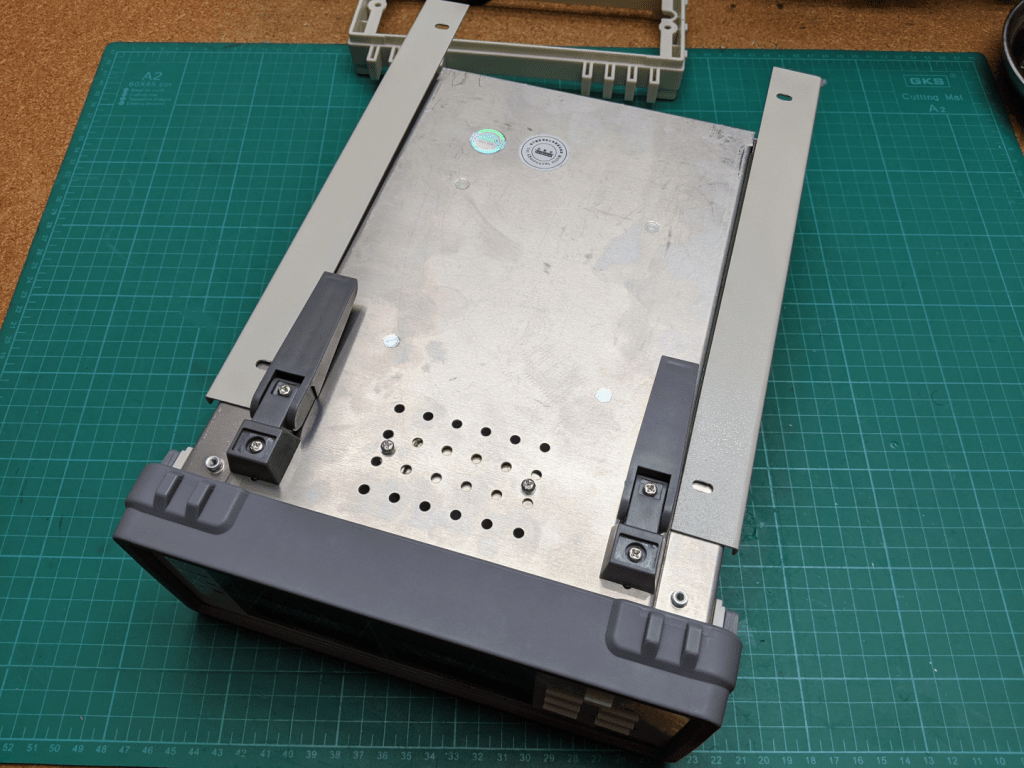
The back bumper is held on with two screws threaded into the back panel. To remove the side/ top steel panel four screws on the bottom of the instrument are removed and the sides slide off revealing a surprisingly roomy and clean interior.

The instrument power supply is a simple 9V transformer. From there a LM2596-5.0 DC-DC step down converter provides the 5Vdc rail for the display. This 5v rail is separate from another 5v rail provided by the Holtec HT7550-1 linear voltage regulator U3. This 5V rail powers circuitry on the measurement side of the instrument. U4 is another linear regulator providing the 3.6V for the microcontroller, this voltage regulator is a Holtec HT7536-1.
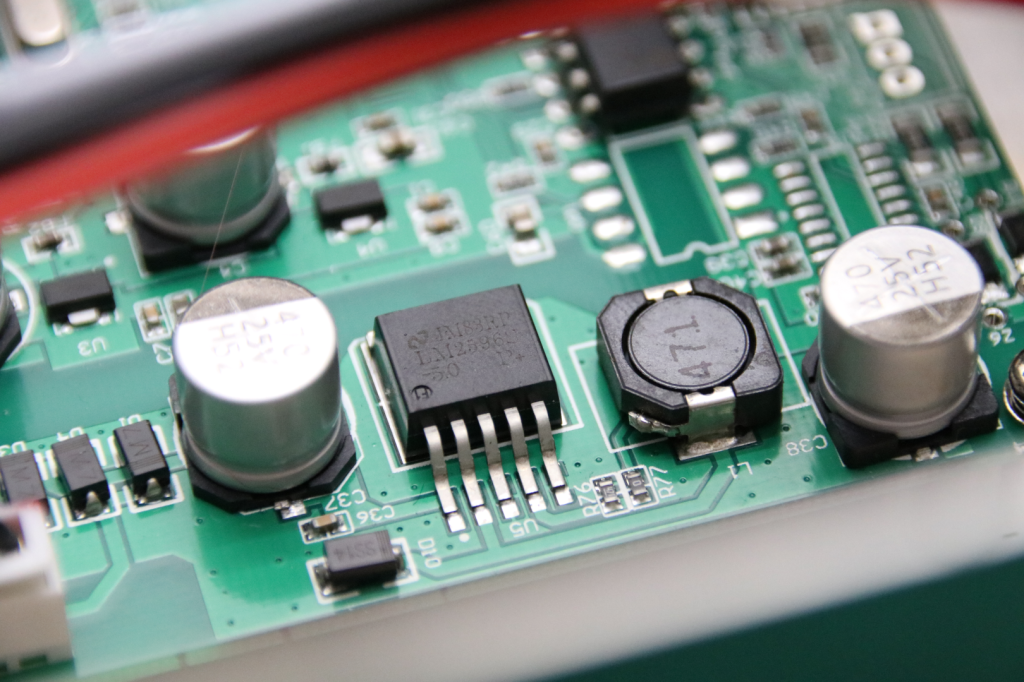
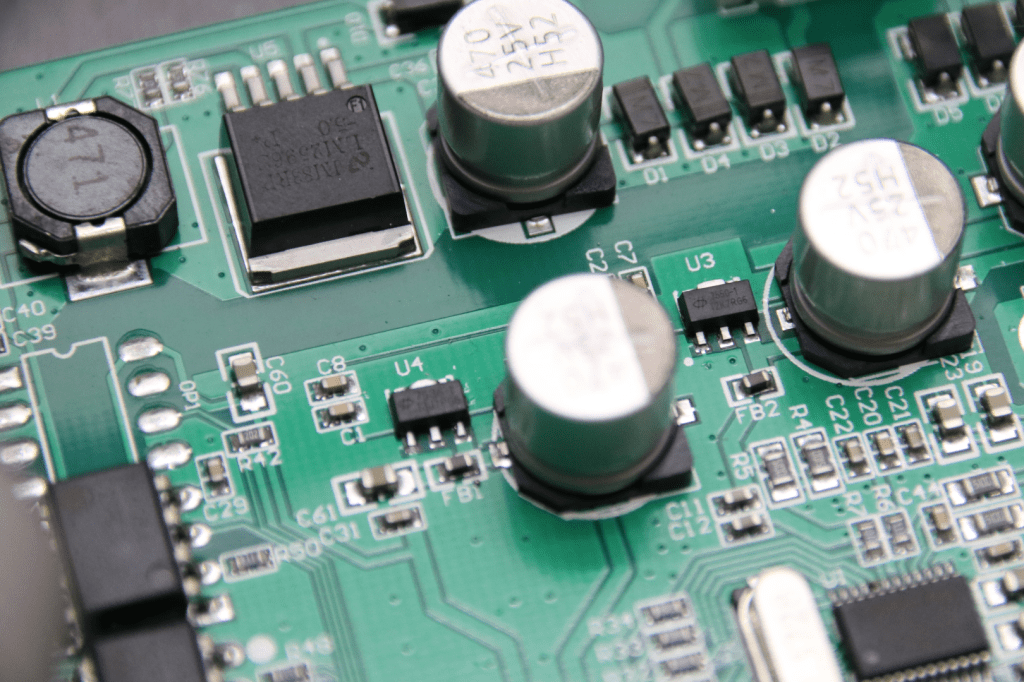
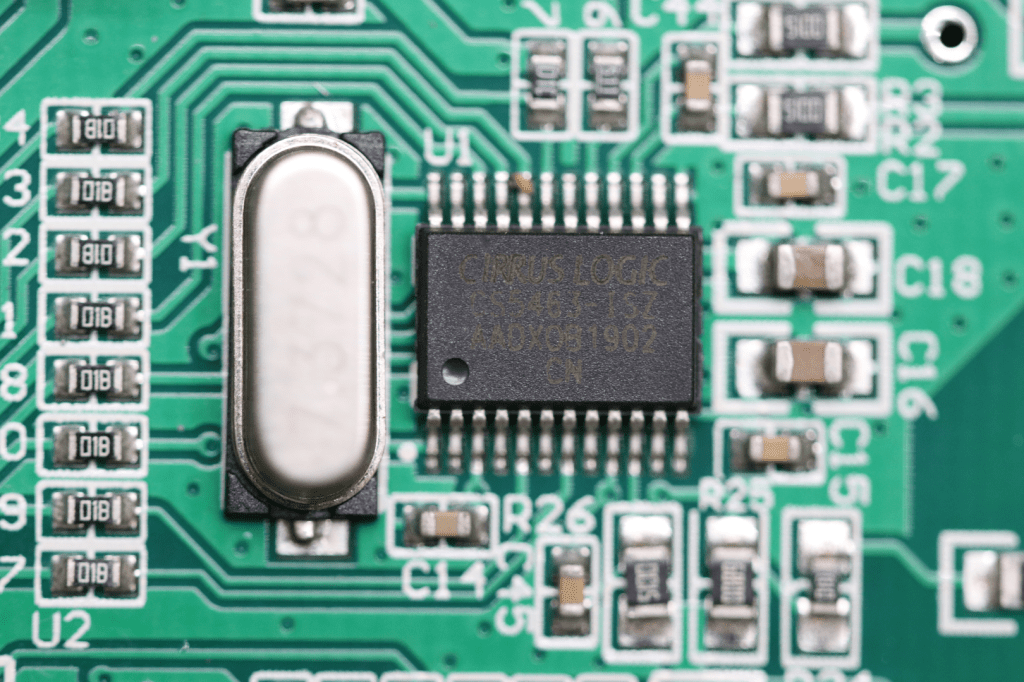
A Cirrus Logic CS5463 single phase bidirectional power/energy IC is what is doing all the measurements and calculations. A quick glance at the datasheet shows that the chip is working well withing the claimed accuracy specs of this instrument so it looks like Matrix advertised realistic specs. The current shunt is an interesting cost saving and is hopefully a calibrated piece of wire to give the expected voltage drop. I suspect that the factory does some sort of calibration after assembly so that none of the components onboard are super critical and can be corrected in software.
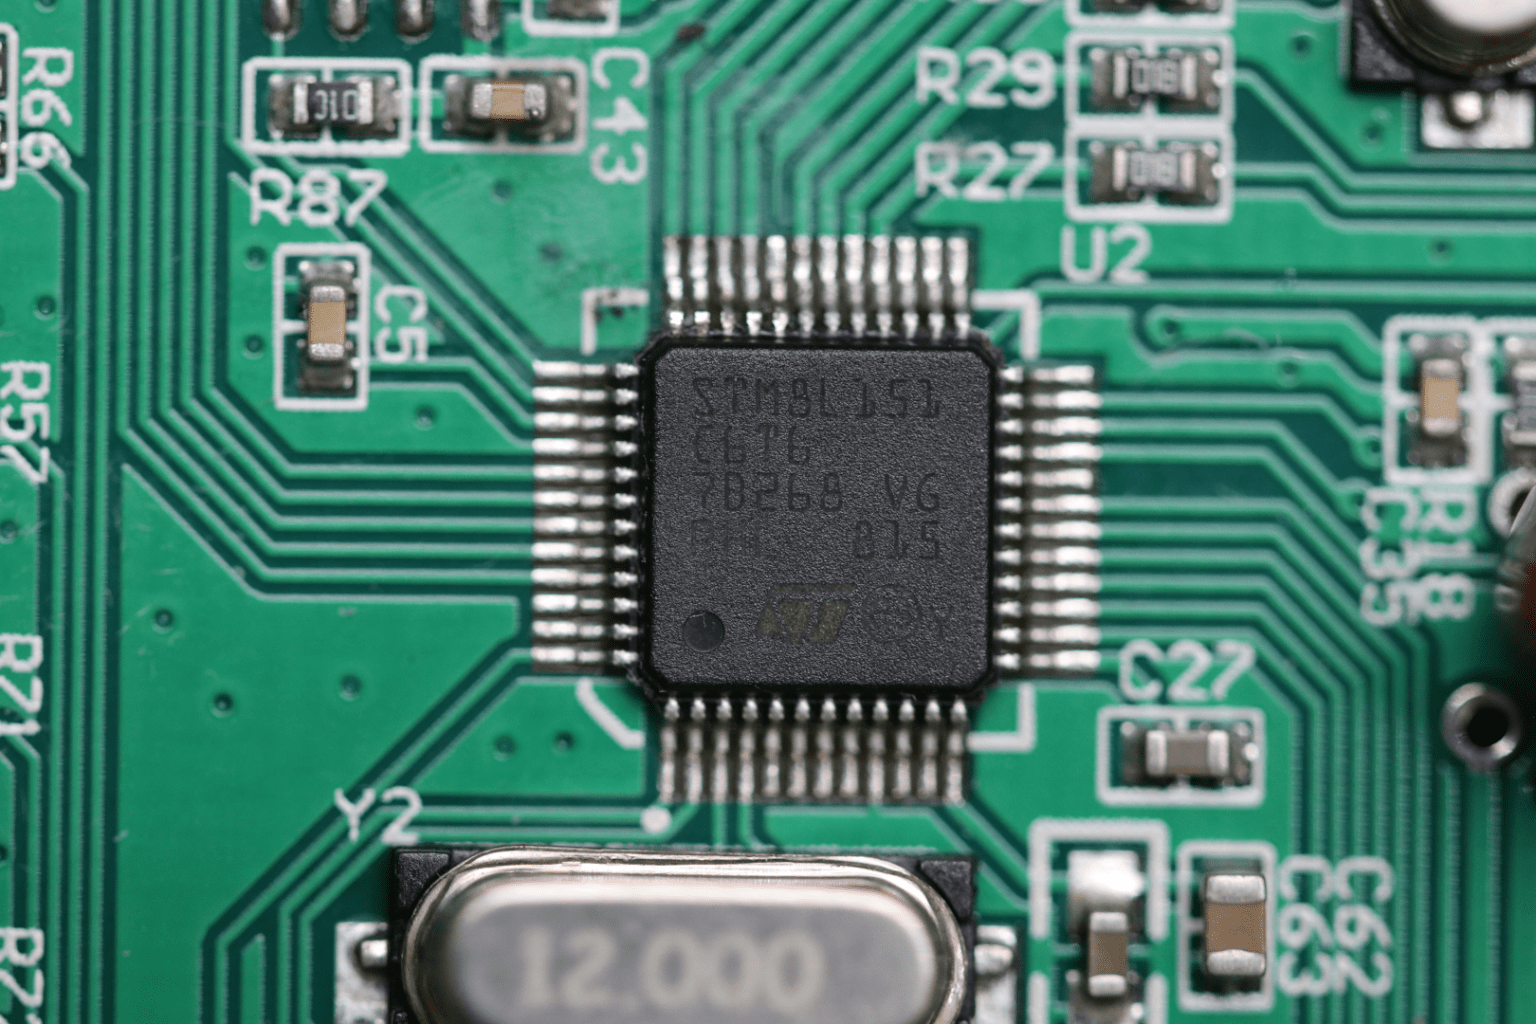
I was not surprised to see a ST microcontroller on the PCB but I was surprised that it was a STM8L151C6 and not something common like a STM32F103C8 that is found on the STM32 Blue Pill development boards. The STM8 family are 8-bit micros compared to the STM32 family which are 32-bit ARM Cortex micros. Since the measurements are done using the CS5463 the STM8 is not doing any heavy lifting and only has to be able to communicate over SPI with the CS5463 and drive the display. JP4 looks suspiciously like a debug header and should allow the contents of the STM8 to be read from flash.
The display is optical isolated from the measurement circuitry and microcontroller. This is a nice safety feature to see especially when this instrument can be used to measure up to 300VAC at 10A. This optical isolation also explains the separate 5Vdc power rail provided by the DC-DC converter mentioned earlier. The PCB looks to have good track separation between the two sides of the optical isolation.

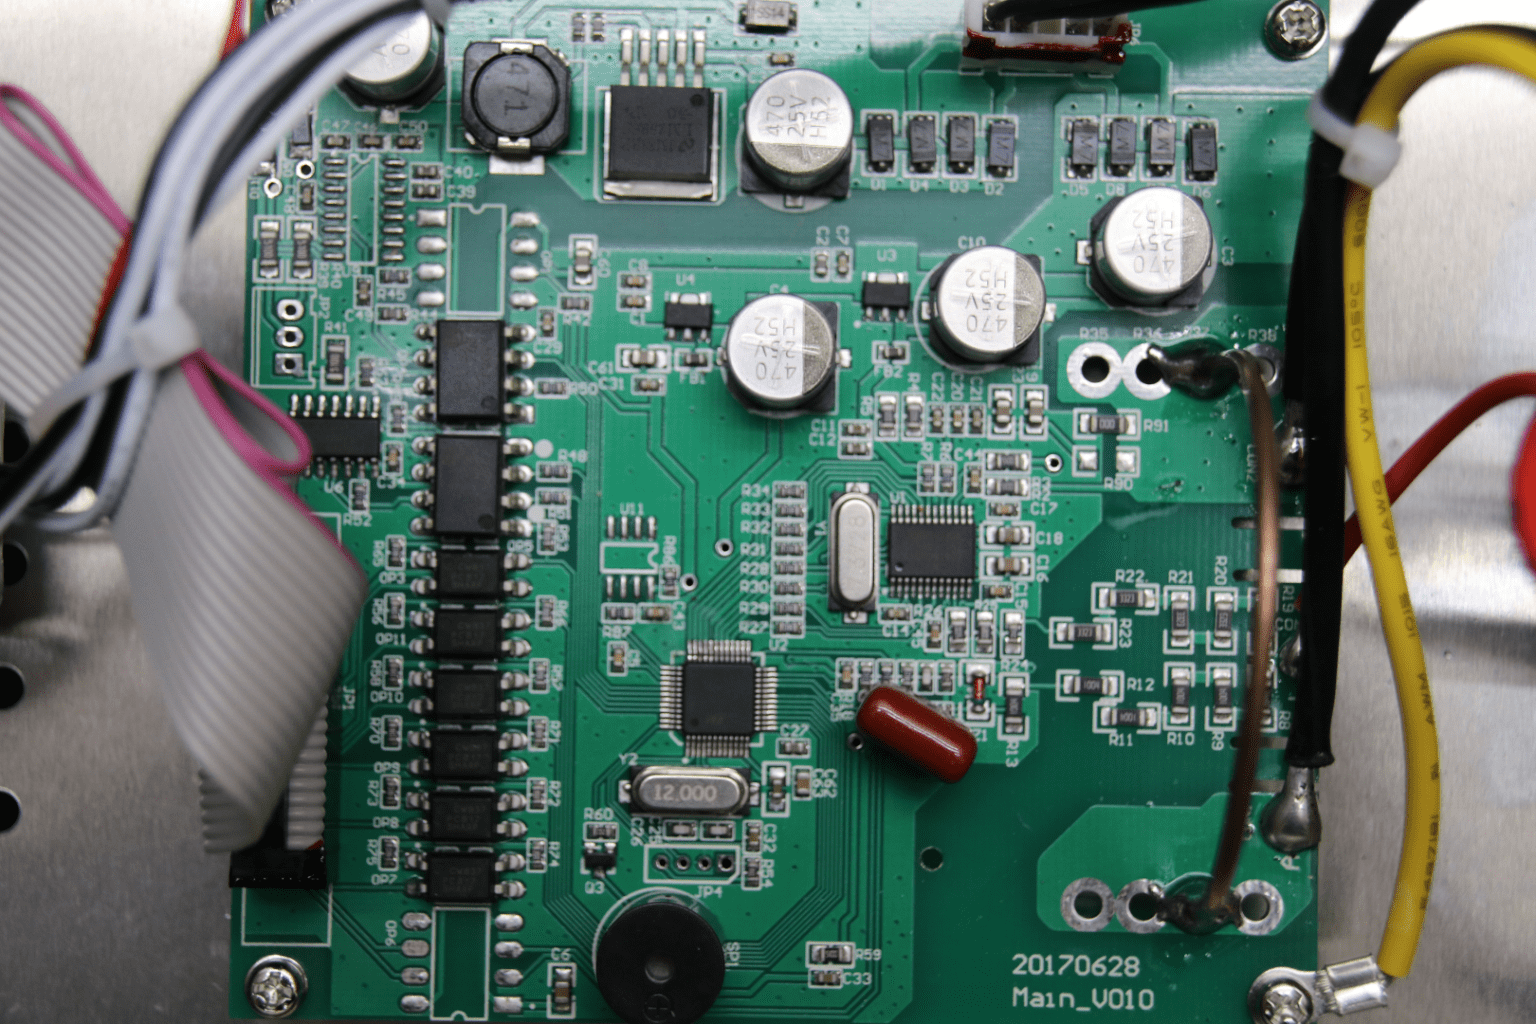
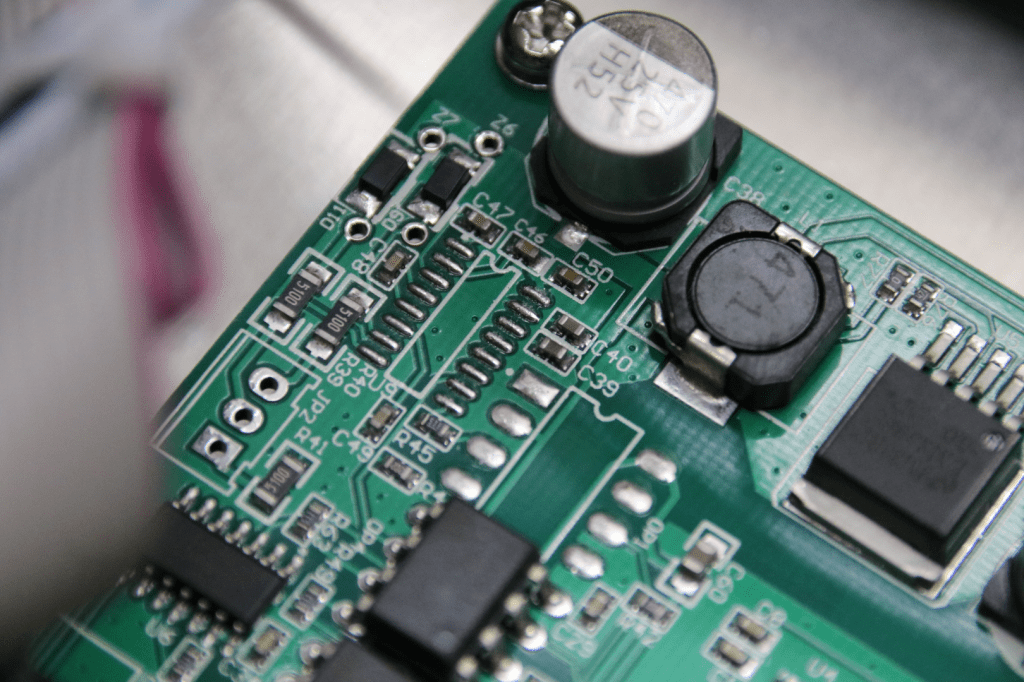
The upper left corner of the PCB in the photo above is unpopulated and I believe that is where the optional RS-232 circuitry would be installed. A quick poke around with a multimeter suggests that a MAX232 or similar IC would fit this footprint. I am not sure if the micro is setup for RS-232 communication in the firmware. I probed around using a oscilloscope on pins 41 and 42 of the STM8 which are the UART pins that connect to the RS-232 circuitry but it does not appear that the micro sends any data. The manual does not contain any info on the RS-232 commands and a quick Google search does not revel any info. Without this info it does not seem like populating the RS-232 circuitry will do any good.
Measurement Comparisons
I’m going to take a few measurements with other instruments I own in an attempt to see how close the MPM-1010 comes to its claimed accuracy. This is not a thorough accuracy measurement and it should be noted that none of my instruments have been calibrated in a long time. Close enough counts for me especially with AC measurements when I just want to confirm if something is drawing way more power then expected.
Voltage
I don’t have a variable AC power supply so for voltage I am going to use a function generator set to output a 60Hz sine wave and vary the voltage for low AC voltage measurements. For a high AC voltage measurement I will use the AC voltage from the wall outlet. The most accurate benchtop meter for measuring AC is a Keithley 172A that I recently picked up at ±(0.2% + 6 counts). Again I want to make sure the MPM-1010 measures voltage close to what it claims, I am not going to be able to confirm the accuracy specs claimed in the manual.
| Keithley 172A AC Voltage Measurement | MPM-1010 AC Voltage Measurement |
|---|---|
| 1.0079 Vac | 1.00 Vac |
| 7.142 Vac | 7.13 Vac |
| 119.89 Vac | 119.9 Vac |
Strangely the meter has a 4 digit voltage display but the low voltage measurements only display 3 digits of resolution. I was also hoping to use the function generator to vary the input frequency but the MPM-1010 does not read the frequency at the two low voltage readings. I guess I will skip checking the frequency and move on to current.
Current
For current I will use the 120Vac outlet and two loads, a 5W AC fan and a Riden RD6006 power supply at about 300W load. This time the best benchtop meter I have for measuring AC current is a Keithley 197 at ±(0.8% + 100 counts). Not close to what the MPM-1010 claims but it should be good enough to make sure that Matrix is not way off about their meter’s capability.
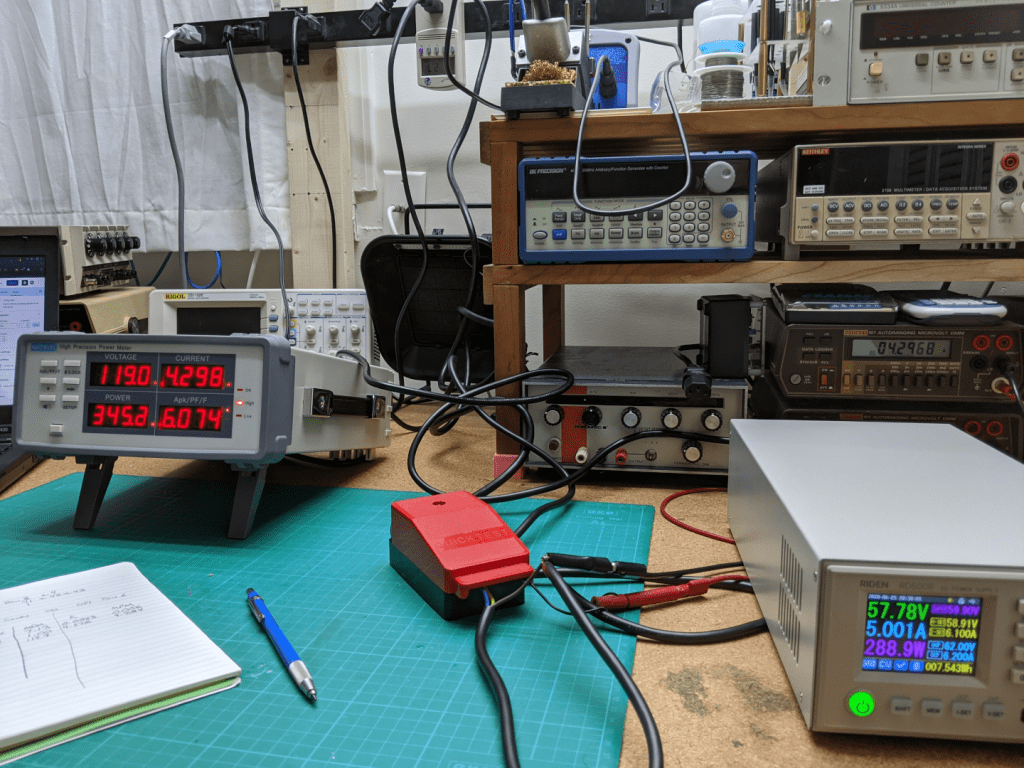
| Keithley 197 AC Current Reading | MPM-1010 AC Current Reading |
|---|---|
| 0.0563 Aac | 0.056 Aac |
| 4.2968 Aac | 4.298 Aac |
The quick spot check of current looks good and seems to use the full 4 digits at both loads.
I don’t have any of the equipment or desire to check the power factor measurement or peak current so I am going to assume for my purposes that if the voltage and current measurements of the MPM-1010 are good the rest of the meter is good to use.
Conclusion
That’s all for this meter. I am happy with it and it will be taking a place on my workbench if I can find space between all the Keithley multimeters. Otherwise I will be sure to keep it close by. I would like to add as a final thought that with this meter it would be good to have a few extra IEC power cables that you don’t mind cutting up to enable connecting the instrument to a variable AC power supply or connecting loads to the instrument that do not have a standard AC power plug. This meter also goes well with the Cliff Quick Test which not only breaks out the connections but provides a level of safety and lets the user disconnect the load.

Thank you for your information here. Do you happen to have a manual I can download – or you can email it to me: czecht@gmail.com Thanks again and have a great day!
LikeLike
Sorry about not getting back to you sooner. Here is a link to the manual on my Google Drive: https://drive.google.com/file/d/1r7-aBpySNppm-hL2Y4E72VJzSXyKvUQF/view?usp=sharing
LikeLike