After reading a few articles in Digital Machinist featuring the CNC 3018 Pro Router (called 3018 pro for the rest of this article) I decided to pick one up. I have a Grizzly G0758 benchtop milling machine that my grandfather and I (mostly my grandfather) converted to a 3 axis CNC mill. The only problem with that machine is that because of its size and the amount of noise it makes it is impossible for me to use in my small apartment so for the time being it stays in my grandfathers basement shop where I can use it when I visit.

In contrast the 3018 pro while not as powerful and full featured is perfect for my small apartment. I plan to use it mostly for engraving and PCB milling.

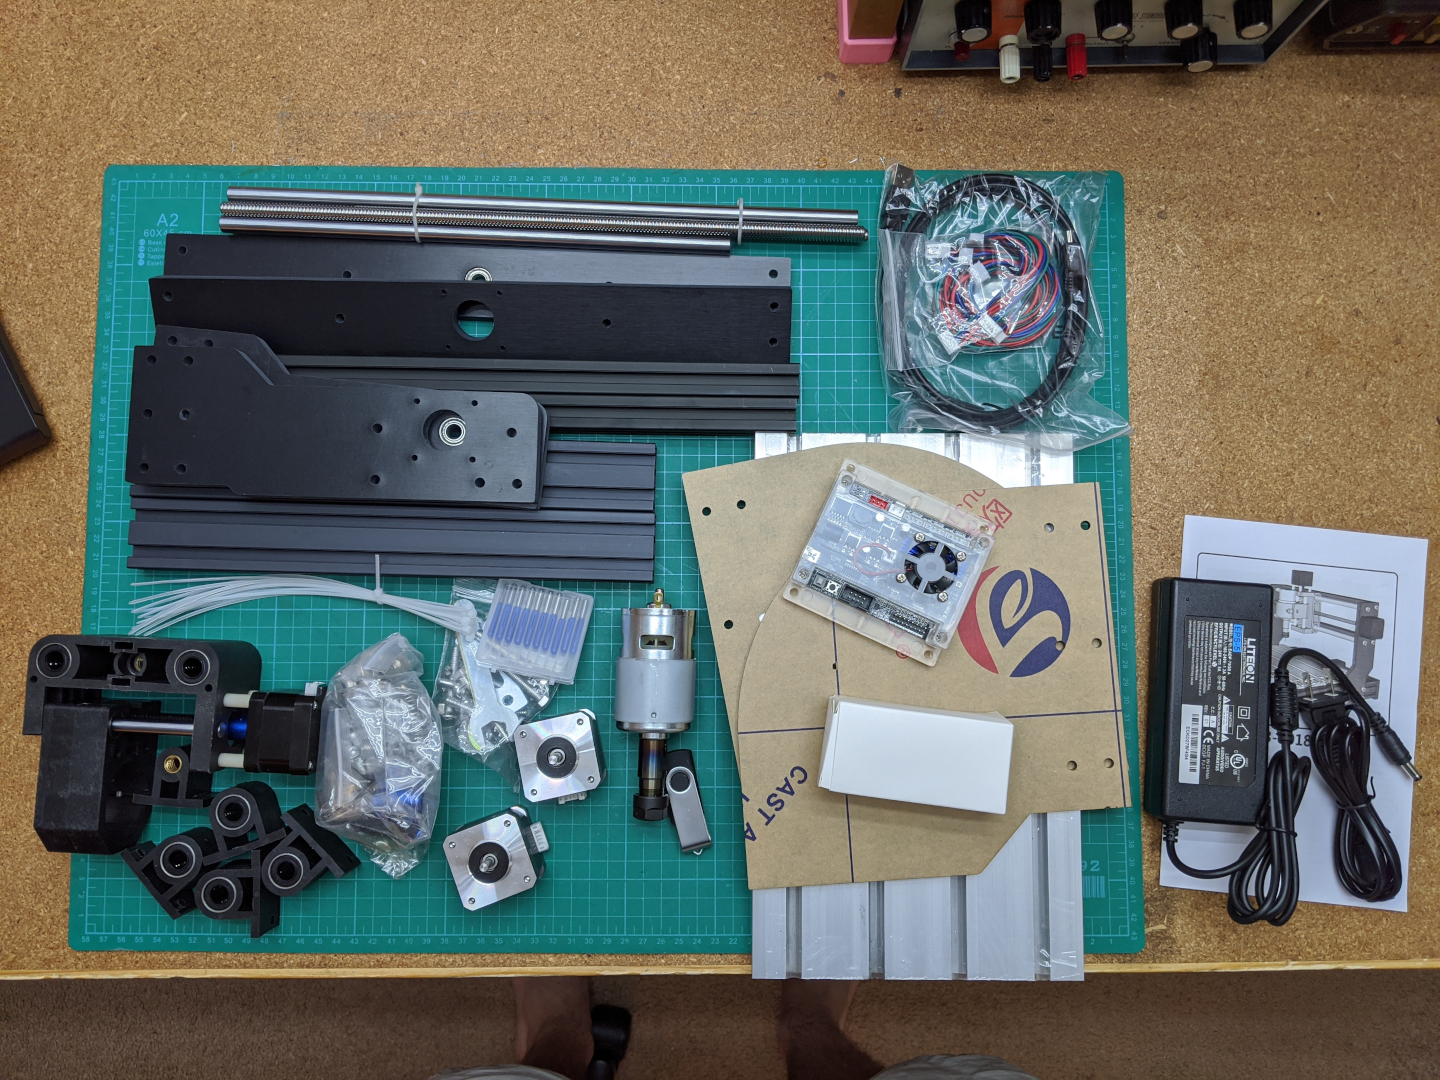
I picked up my machine from AliExpress and it was shipped via DHL and arrived within one week. You can get the same machine from Amazon but at the time of writing this article it costs about $50 more even when you factor in the cost of shipping for the one from AliExpress.

Assembly
I am not going to write up an assembly guide, the assembly instructions that come with the 3018 pro are good enough and there are countless guides on YouTube. I do have a few suggestions for things that are not mentioned in the manual.
- There was a strong acrylic odor upon opening the box and during assembly. This will go away after the machine has been left to air out but you will want to work in a well ventilated area.
- Make sure you have a square on hand, I used a machinist square but a combination square or speed square will do. I used it to make sure the frame was square along with making sure the spindle is square to the bed.
- File the edges of all the plastic injection molded parts. The linear bearing holders for the bed look like they were machined after molding and had burs on the edges that needed cleaning up so they would sit flat on the bottom of the bed.
- Grease the leadscrews before assembly. I used a generous dab of Super Lube 21030 on the X and Y nuts before threading in the leadscrews. Also apply some lube on the Z leadscrew.
- When installing the bed mount the linear bearings first before mounting the Y leadscrew nut so that you can properly align the leadscrew.
- The mounting holes on the case for the controller PCB were not sized right for M5 bolts and had to be opened up before mounting it to the frame.
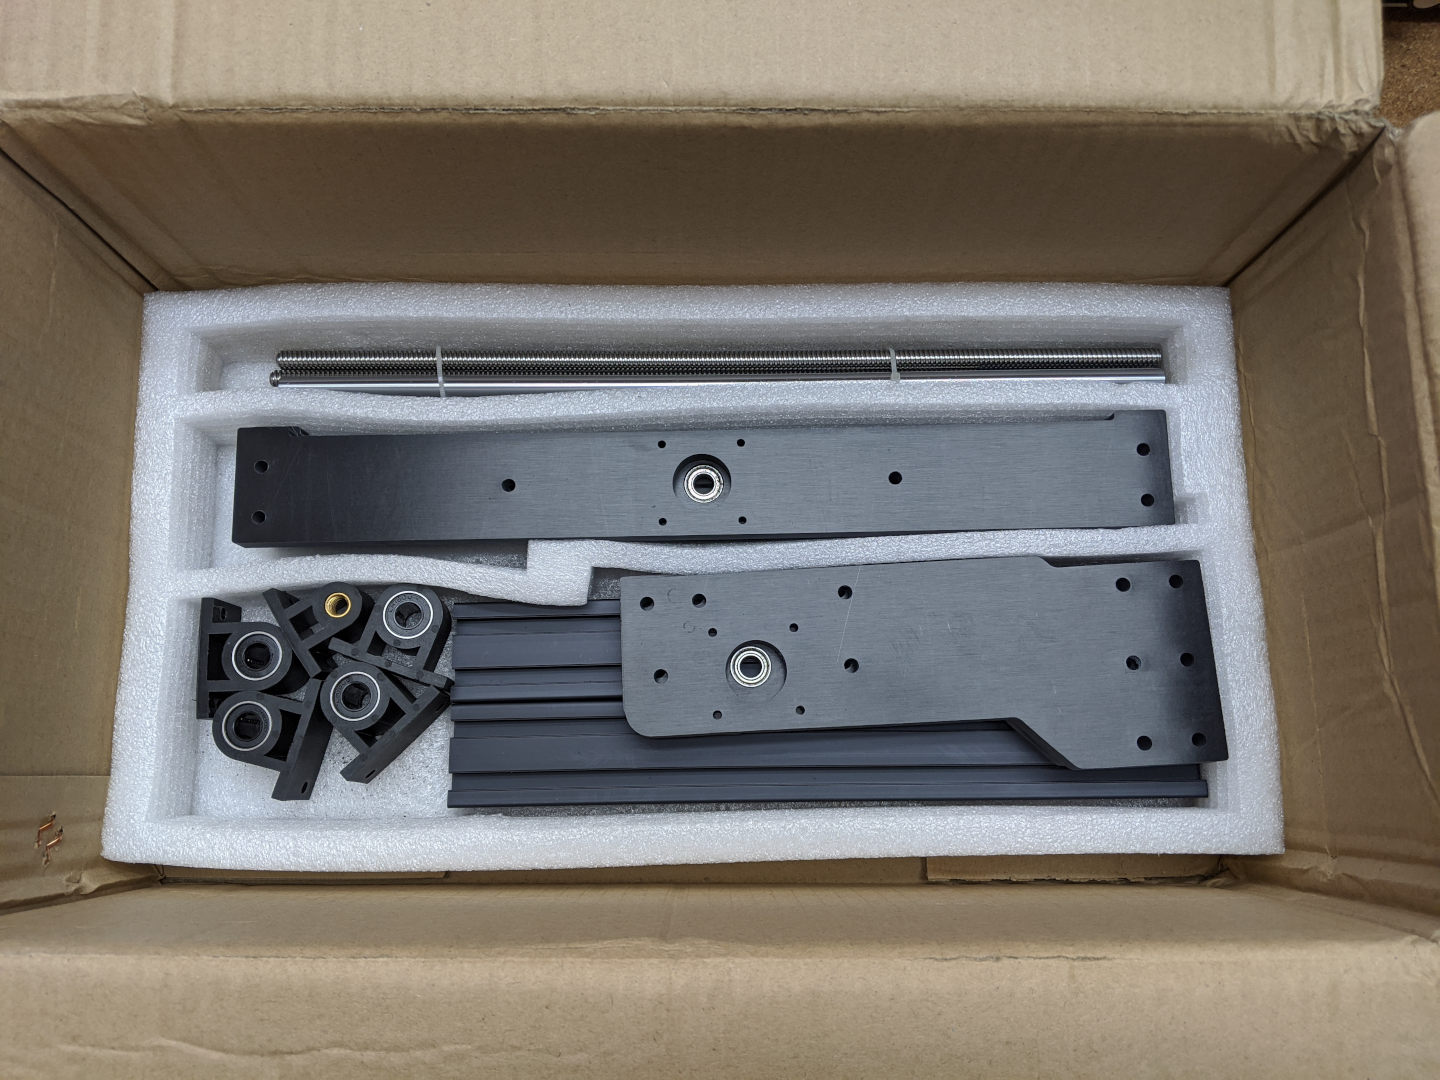

Overall assembly was easy and took me a little over 1.5 hours. Most of that time was spent getting the frame square. Having a square frame is super important and will greatly improve the usability of the 3018 pro.
Software and Firmware
The firmware installed on the controller that came with the 3018 pro, a Woodpecker V3.4 for my machine, is GRBL 1.1f. This firmware handles all the real-time control of the 3018 pro and parses commands that are received via the USB port on the controller. The easiest way to send commands to the controller is to install a GRBL Controller Application on your PC. Candle is a popular choice but I went with bCNC since I was able to find a ready to install package in the AUR for my Arch Linux laptop. The wiki for bCNC is a great resource on how to connect to the 3018 pro and how to control it.
I ordered my 3018 pro with the offline controller and I think I would have skipped it if I knew how it works. It seems to only enable jogging of the axis and then will run gcode from a SD card. But there does not seem to be any way to zero the axis or confirm the machine will not crash before running the gcode. If it doesn’t add to much to the cost of the 3018 pro maybe pick it up but don’t spend more then $10 extra on it. A better offline controller is to use a Raspberry Pi with bCNC installed that you can remotely connect to over WiFi.

Aside from the GRBL Controller Application you will also eventually need to install software on you PC to generate gcode. Looking around it seems like using Inkscape for design is the path that most everyone takes. Then you can use a program that will generate gcode from a SVG file, jscut is a good option. If you watch YouTube tutorials many of them will use Easel or Carbide Create. Easel is limited unless you pay for a subscription and Carbide Create does not have a Linux version. For more complicated designs I know that FreeCAD can generate gcode but for the simple objects I will be making with the 3018 pro I think using Inkscape with jscut will be just fine. Mainly I want to use the 3018 pro for milling PCBs and for that FlatCAM seems like an excellent solution. Best of all it is free and open source.
GRBL Configuration
With bCNC installed on a connected PC it is now possible to send configuration commands to the 3018 pro controller to tune some of the settings. A complete list of configuration settings can be found on the GRBL wiki.
I increased the acceleration values for the x and y axes using the following commands:
$120=240.000    ; X Acceleration, mm/sec^2
$121=240.000    ; Y Acceleration, mm/sec^2
$122=60.000     ; Z Acceleration, mm/sec^2
I chose the x and y acceleration values by doubling the default acceleration values of 30mm/sec^2 until I hit a point that the axes accelerated fast but did not stall the motor. I think it is possible to go way higher since I reached a point where I thought the motor was accelerating fast enough but leaving them low works for me. For the z axis I doubled the default value and left it at that, this axis does not need to move as far as the other two so slow acceleration values are fine.
To increase the max feed rate for all three axis lets understand the maximum theoretical speed of axes. All three axis are driven with a 2 start 2mm pitch lead screw giving 4mm of linear travel per revolution. The steppers for all three axis are setup for 800 steps per revolution giving a resolution of 5um per step. GRBL is capable of generating steps at a rate of 30,000 per second.

That is way to fast so I chose a value of half of that at 4500 mm/min for the x and y axis. I bumped the z axis up by a factor of two from its default of 600 mm/min to 1200 mm/min. To increase the max feed rates issue the following configuration commands:
$110=4500.000 	; X Max rate, mm/min
$111=4500.000 	; Y Max rate, mm/min
$112=1200.000 	; Z Max rate, mm/min
Conclusion
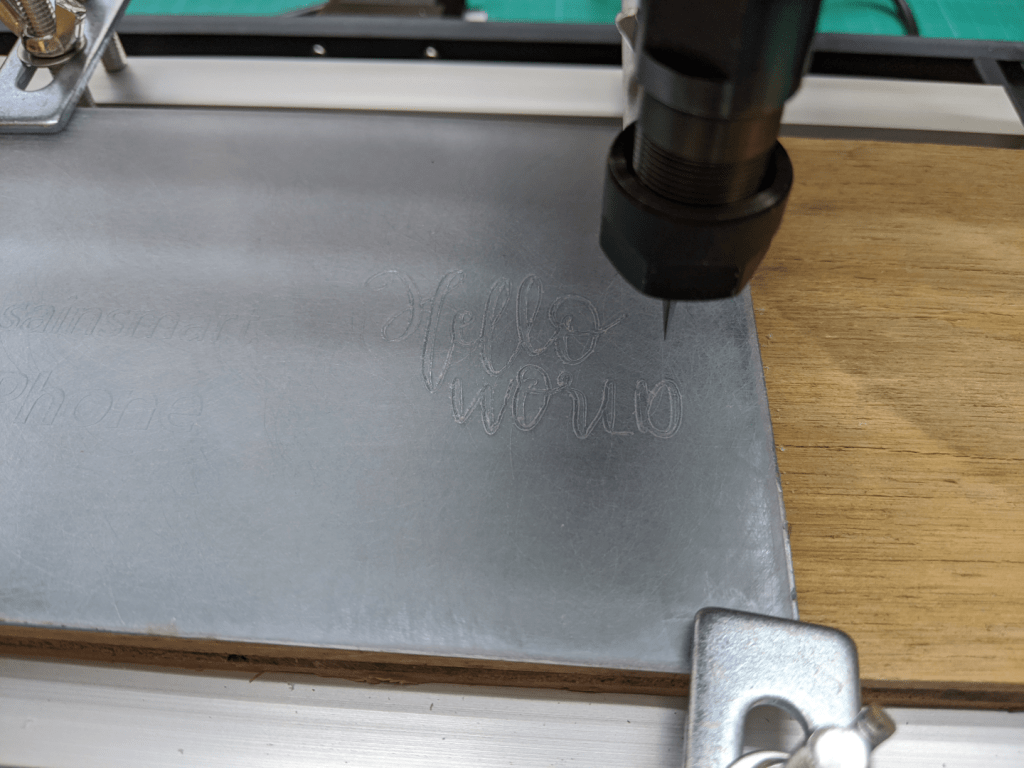
That is about all that I can say about the 3018 pro since I have very little time actually using it other then running a few test engravings. I am sure I will be posting many more articles in the future about this machine, I have an article in which I add endstops in the works.

So how did those max feed rate settings work for you? Was your CNC actually able to maintain decent accuracy when operating at 4500 mm per minute??
LikeLike
The max feed rate is set so that the machine could possibly go that fast if I ever find the need for it to do so. In practice the CAD/CAM program generates gcode with a much lower feed rate. In my projects I typically use 120mm/min in the X and Y axis and 60mm/min in the Z axis.
LikeLike