With my DaVinci 1.0 3D printer proving to be useless as a printer I was looking for a way to repurpose the machine. After creating a few electronics enclosures I needed a way to label the terminal connections and that got me thinking about converting the old printer to a laser engraver. A quick google search gave me this Instructable which I referenced for the installation and software. I purchased this laser module from Amazon: Laser Head for DIY CNC 3 Axis Engraver Machine.
Installation
Since the printer would no longer continue life as a printer I removed the hot end and extruder and was left with the y carriage. To mount the module I printed up a quick mounting bracket that utilizes the original mounting holes on the y carriage. Some modification was needed to make clearance for the mounting bolts on the laser module, of course the Dremel and cutoff wheel made quick work of that.
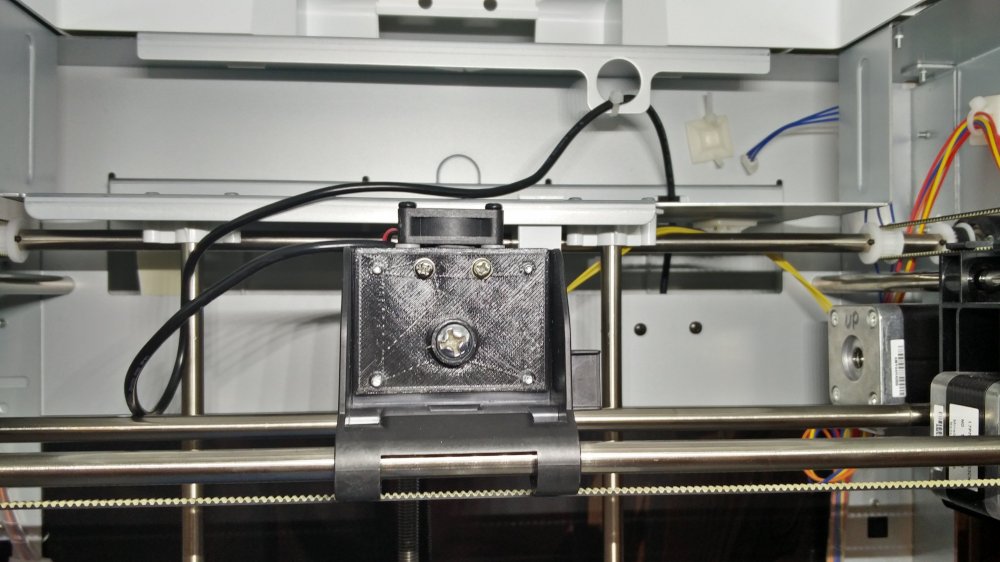

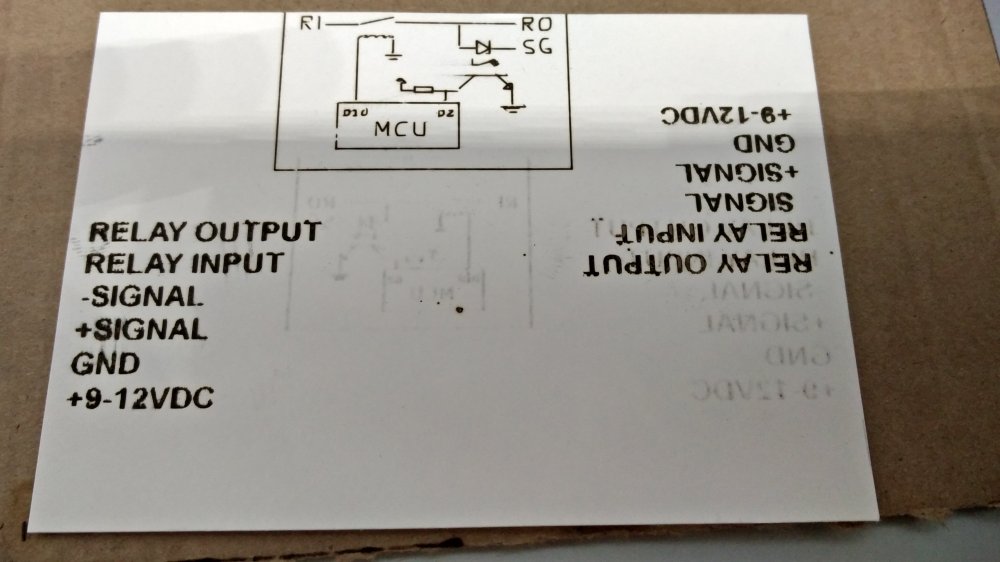
The only connection on the laser was 12VDC power, I will be able to control the laser by turning on and off the power. The Instuctable I was loosely following uses the cooling fan to control the laser but that particular printer has a 12VDC cooling fan, the DaVinci 1.0 uses a 5VDC cooling fan. I threw together a quick circuit that allows the 5VDC fan signal to control 12VDC power to the laser.


Software
Again the Instructable I was following suggest to use Inkscape with a svg to laser gcode extension from J-Tech. This works great for engraving outlines of text or cutting shapes but I wanted to be able to etch filled in images and words so because of that I purchased Laser Etch B/W from the makers of the Inkscape extension. The Inkscape extension and the purchased software so far is easy to use and works for everything I want to do.
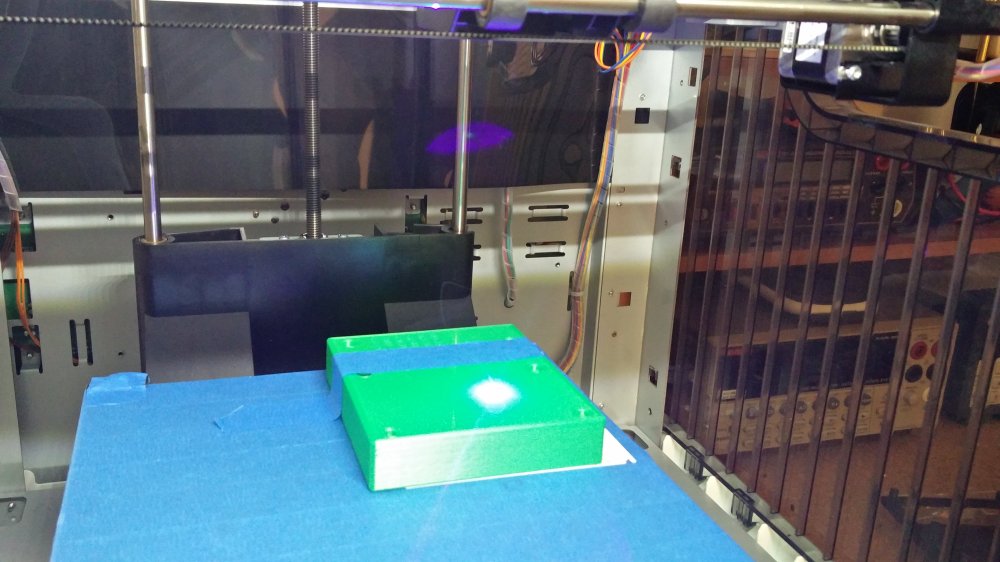
The Results
This turned out to be an easy conversion and I am happy with the results. I have some settings to tweak for getting the perfect marking in 3D prints but that is all software related.
I have uploaded all stl files and Fusion 360 files to Thingiverse: https://www.thingiverse.com/thing:2437495


are you using the original XYZ stock firmware or you have to flash a third party firmware?
LikeLike
I switched to third party firmware long before the printer was converted to a laser etcher. It uses Repetier 0.92. You can find it here: https://github.com/luc-github/Repetier-Firmware-0.92
There are loads of tutorials a google search away about how to upload the firmware if you need help.
LikeLike
any specific settings for laser module or just use the standard DaVinci 1.0 settings?
LikeLike
just the standard DaVinci settings I think
LikeLike
if the setting is not at the firmware, is that mean you control the laser beam using the software?
LikeLike
Yes, the inkscape plug-in and the purchased software from JTech work with the firmware as is. I think most other software can behave this way. The laser is turned on and off with the g-code command that normally controls the layer cooling fan. The x and y axis are moved normally and the z-axis is ignored by the software.
LikeLike
can you list the parts for converting 5V to 12V? I am converting my Davinci 1.0
thanks
LikeLike
found DC 3.3V 3.7V 5V 6V to 12V boost converter on amazon, that probably would work.
LikeLike
You need to be able to switch the 12V power with the 5V signal. A DC to DC converter will not work. If you are unable to build something then this may work: https://www.amazon.com/HiLetgo-IRF520-MOSFET-Arduino-Raspberry/dp/B01I1J14MO/ref=sr_1_9?ie=UTF8&qid=1508727524&sr=8-9&keywords=arduino+mosfet
Try searching for Arduino Mosfet or something similar. Of course Adafruit and Sparkfun have similar items with much better documentation.
LikeLike
Can you show where you get the 5V from? A few pictures would be great. is the M106 is on and M107 is on for Davinci?
LikeLike
The 5V is from the extruder cooling fan on the DaVinci, you disconnect this fan and use that 5V as a signal line to control the 12V to the laser module. I can’t show you any pictures since my DaVinci has already been modified. If you need to find the fan connector on the control board is should be labeled on the silkscreen next to a 4 pin JST connector. And yes M106 and M107 turn on and off this fan/laser control.
The Instructable I linked to at the beginning of the post may provide a few more answers too.
LikeLike
Hello SAM, thanks for the instruction.
the Mosfet you listed from amazon, seems like it is designed to receive a signal from a controlling source. (Arduino). How can I apply it to the DaVinci 1.0 5vdc FAN power source to control 12vdc laser module?
I see V+ and V- is for the load (laser module). Vin and Gnd is for the 5vdc (Fan power source).
SIG, VCC, and GND. what do I need to do with those?
LikeLike
Can you list your controller parts?
thanks
LikeLike
The 5V fan power will become the control signal. The +5V of the fan connects to the SIG. You run a 12V line from on the control board to Vin. The ground gets connected to ground. The laser connects between V+ and V-. I am not really sure but Vcc may be connected to Vin, you would have to see if the seller provides documentation or test it with a multimeter if you buy it. Or buy something similar from Sparkfun/Adafruit and they will offer more documentation and possibly a few tutorials. I suggest you read up on MOSFETS to better understand how to use them as a switch, Sparkfun and Adafruit have tutorials. Youtube also has many great videos from EEV Blog and Afrotechmods on MOSFETS as a switch just to name a few.
LikeLike
I got all the instruction I needed for my project, thanks
LikeLike
Sam,
can you please check if your DaVinci’s LCD menu have FAN option?
Looks like M106 / M107 is being ignored. My LCD menu does not have a FAN option. You mentioned you used the repeatier host default configuration file which I did the same.
LikeLike
Yeah, I have a fan option. I may have modified the config file, honestly I don’t remember since it was when it was still a 3D printer. Go through the config file and see if there is an option to set it.
LikeLike
I have modified my DaVinci 1.0 with 3W blue laser following your instruction. I can cut paper and printer image outline but I can’t get it to engrave image. Are you able to get your engrave image on wood? please share what you have to do get that working. thanks
LikeLike
I’ve been looking all over for an instructable on how to do this since I’m retiring my 1.0. Do you have the stl file for your mount and a link to the laser you used?
LikeLike
I have uploaded everything to Thingiverse. You will find the STL files and the Fusion 360 files if you need to edit something to fit a little better.
https://www.thingiverse.com/thing:2437495
LikeLike
Almost forgot, here is a link to the laser I bought: https://www.amazon.com/gp/product/B01H6XN1TA/ref=oh_aui_detailpage_o07_s00?ie=UTF8&psc=1
LikeLike