Psst! Looking for more? Check out the Tronxy P802M page with links to other articles about modifying and improving the Tronxy P802M 3D printer.
3D Printer Down!

My 3D printer, a DaVinci 1.0 by XYZPrinting, printed its last parts a week ago. I needed some wire tie downs and was iterating through the design when I noticed that the extruder was making these clicking noises and then stopped extruding. I was able to disassemble the hot end and clean out all the gunk by soaking it for an hour or two in acetone. Afterwards I barely managed to print 16 of the tiedowns to finish the project (a future post when I verify that it works).

A little bit of forum and Google searching brought me to the conclusion that a few things were going wrong. The extruder guide wheel and idler had worn out and was not applying the correct grip to the filament creating that clicking noise. The nozzle was worn out after hours of plastic building up inside and a replacement from XYZPrinting was going to set me back $100. Check out the bur in the picture below, my guess is that hours of forcing hot ABS plastic though the brass nozzle caused that bur.

I was not a fan of the original hot end and I had also just changed the firmware over to Repetier so I decided it may be time for an upgraded 3rd party hotend. This is where I ran into a problem, all the hotends required a custom mount that you print using a 3D printer, you can see my dilemma here. Without a 3D printer or a machine shop I would not be able to repair my printer. Enter the inexpensive 3D DIY printer kit.
The Replacement

For about $165 shipped I could buy a new 3D printer and in turn use it to fix up my DaVinci 1.0. Plus I figured after the cost of a new hotend (I had my eye on the E3D v6) and the cost of using Shapeways to print the adapter mount I could get a second inexpensive printer. So I purchased the Tronxy Prusa i3 P802MA from eBay for $162 shipped and it arrived within a week! I believe this is a clone of the Anet A8 which in turn is a clone of the Prusa i3.
The printer arrived disassemble with a micoSD card containing a PDF of the assembly instructions. Twelve hours later after messing up the Z axis motor mounts three times, having to adjust for the deformed X axis mounts, and wire wrangling I ended up with my first print.
A Few Uglies
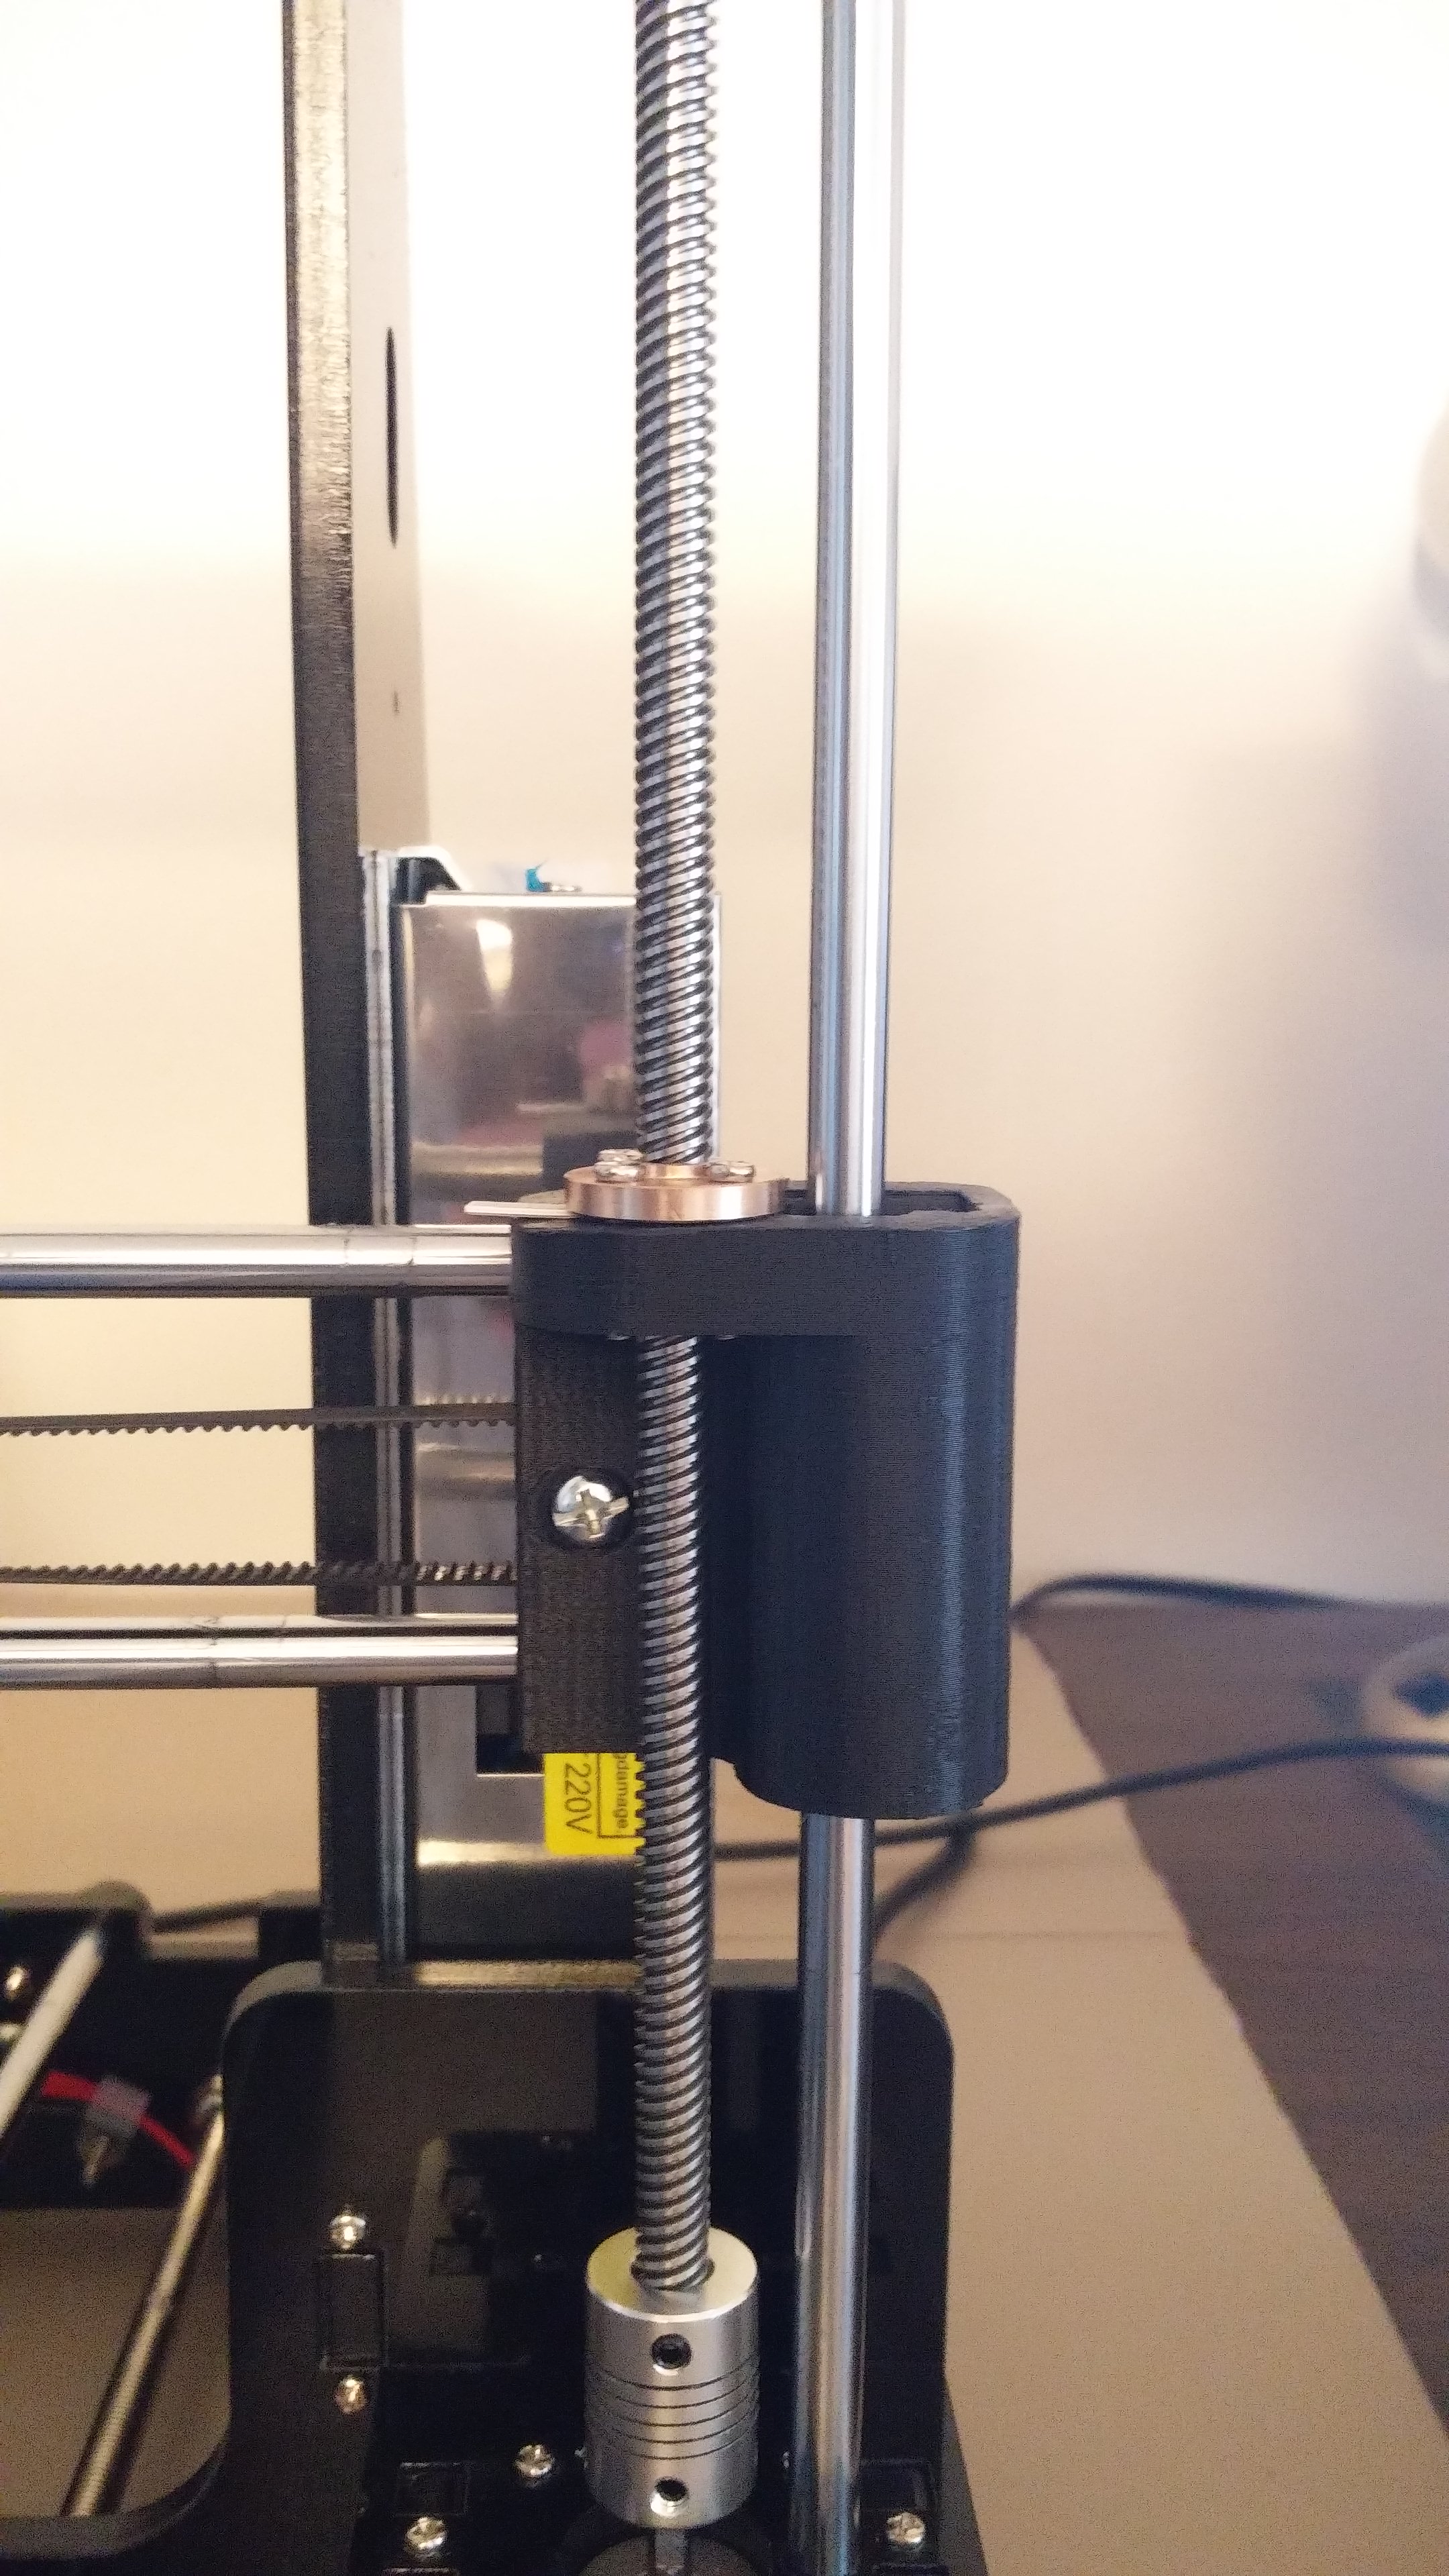
Before going further into printing I want to highlight a few problem areas I experienced with this printer, the first is the Z axis lead screws. The kit included 3D printed parts that connect the X axis to the Z axis. I am not a fan of these parts. They are visibly warped on the top and I found after assembly this caused the Z axis to bind on the lead screws. The problem is that the lead screws are not held parallel to the sliders. To compensate for this I loosened up the lead screw nuts while the printer was assembled and then placed plastic shims (from junk mail credit cards and gift cards) underneath the nuts before tightening them up making sure that I could still turn the motors easily by hand. That did the trick but I still may end up printing replacements to correct that issue permanently. Also I do not like that the Z axis relies on the two stepper motors staying in step, maybe the lead screws could be attached with a timing belt underneath?


The wing nuts to level the bed are painful and annoying to use. Soon, after drafting this post, I will replace the wing nuts with proper thumb screws. I’m thinking something turned from brass, on my CNC lathe of course. These could be 3D printed and there are plenty of YouTube videos and forum posts outlining this but I prefer propper turned parts for adjustment nuts.

Last is the power supply. It is a very DIY hack way of mounting and wiring. The line connections are in the open only covered by the plastic door on the terminal block and there is no power button. This will need to be modified soon before I shock myself or develop repetitive injuries from crawling under the table to unplug the printer.
There are also a few minor things that I would like to improve, the hotend and extruder may be one of them, but I don’t feel it is as necessary as the ones outline above. Plus that will be the fun of this printer, modifying it to make it better. Overall with only the included parts from the kit I was able to assemble a working printer.
The First Print
I was so excited after hours of assembly and troubleshooting to finally print a part that I quickly connected to a laptop to set up Simplifiy3D with a default Prusa i3 profile and print my first item. I chose the 3DBenchy torture test using ABS filament, PLA filiment is still in the mail. I did not change any process settings or modify the printer profile except to change the baud rate to 115200. Two hours later and I had this cool little boat, not bad for its first print. There are definitely areas to improve and adjustments to be made, I figured out afterwards the setting for the cooling fan that may have helped with the smoke stack, but overall I was happy that the initial results were so positive.

Connecting to Simplify3D
After the success of its first print I was confident enough to move the printer over to my desktop and connect it to that system. The laptop I initially used runs Ubuntu Linux and I had no issues with connecting to the printer, not so with my desktop running Windows 10. I was able to connect by going to Tools->Firmware Configuration and deselecting Wait for startup command in the Communication tab. If you are having issues give this a try, also experiment with the Allow command buffering and Communication timeout settings. Dont forget to make sure that the baud rate is set for the machine, mine is set to 115200. This can be set when choosing other as the profile in the Configuration Assistant or by editing the process settings.

After gaining communication I then exported the firmware configuration file (using Export in the dialog box pictured above). This way the communication settings stick, I found that they would reset when adding a new process otherwise.
Make sure to setup the starting and ending scripts in the Process Settings other wise you will end up with the printer ending with the nozzle on the part. For the starting script I have:
G28 ; home all axes
G92 E0
G1 Z0.1 F1000
G1 X8.0 F2000
G1 Y60.0 E4.0 F1000.0 ; prime
G1 Y100.0 E8.5 F1000.0 ; prime
G92 E0
And the ending script is:
M104 S0 ; turn off extruder
M140 S0 ; turn off bed
G91 ; use relative coordinates
G1 Z0.6 F5000 ; lift nozzle by 0.6mm
G90 ; use absolute coordinates
G28 X0 ; home X axis
G1 Y195 ; move Y axis to end position
M84 ; disable motors
M107 ; turn off fan
Both of these scripts are copied from the default Prusa i3 profile. Now with communication with the computer you can say good riddance to the horrible menu system on the printer and instead use the controls built into Simplify3D; Tools->Machine Control Panel.
April 2017 Update: I am unable to reliably connect to the printer over USB so I have switched reluctantly at first to using the SD card. I have learned to love it and while it is not as easy as clicking a few buttons in Simplify3d it is very reliable plus I can store the gcode for everything I have printed.
That’s All For Now
And that is all for this post. I did print two more items but they are just boring 20mm calibration cubes. Interestingly they printed within half a millimeter on the Z axis and within 0.1mm on the X and Y axis. Immediately following should be a quick post about the thumb screws I just finished.


View Other Related Tronxy P802MA Articles.

Could you post a write up on how to adjust the Z axis? No matter what I try with this model, the Z axis is stuck at a position where the printing head literally try to dig in the hot bed 😦
LikeLike
Have you adjusted the Z-axis limit switch and the bolt that makes contact with the switch? After that make sure that your bed is leveled properly.
LikeLike
I had the same USB cable issue. Apparently the USB socket is not grounded.
I solder the socket to the ground, also made sure that real ground is supplied to the board.
That fix it.
I will write a port about it soon.
LikeLike
Can u tell me ur motherboard version ? mine is 2.0 V5.
And do u update ur marlin firmware too?
Because if yes need maybe ur help:-)
Sorry from my poor english.
LikeLike
Mine is a Melzi 2.0_V5. I did not update the firmware since it worked as is out of the box.
LikeLike
Very nice post, I like the little bits of humor, def. worth my time to read! Looks like a nifty printer!
Sent from my iPad
>
LikeLike
I guess it all sums down to this………..if you can keep that printer going,
LikeLike