Psst! Looking for more? Check out the Tronxy P802M page with links to other articles about modifying and improving the Tronxy P802M 3D printer.
Bed leveling on a 3D printer is an important feature and the adjustment should be as easy for the user as possible. The wingnuts that came with the Tronxy P802M are terrible; they are small and difficult to use. To solve this problem and to start off the modifications for my Tronxy 3D printer I turned a set of four brass thumb screws.
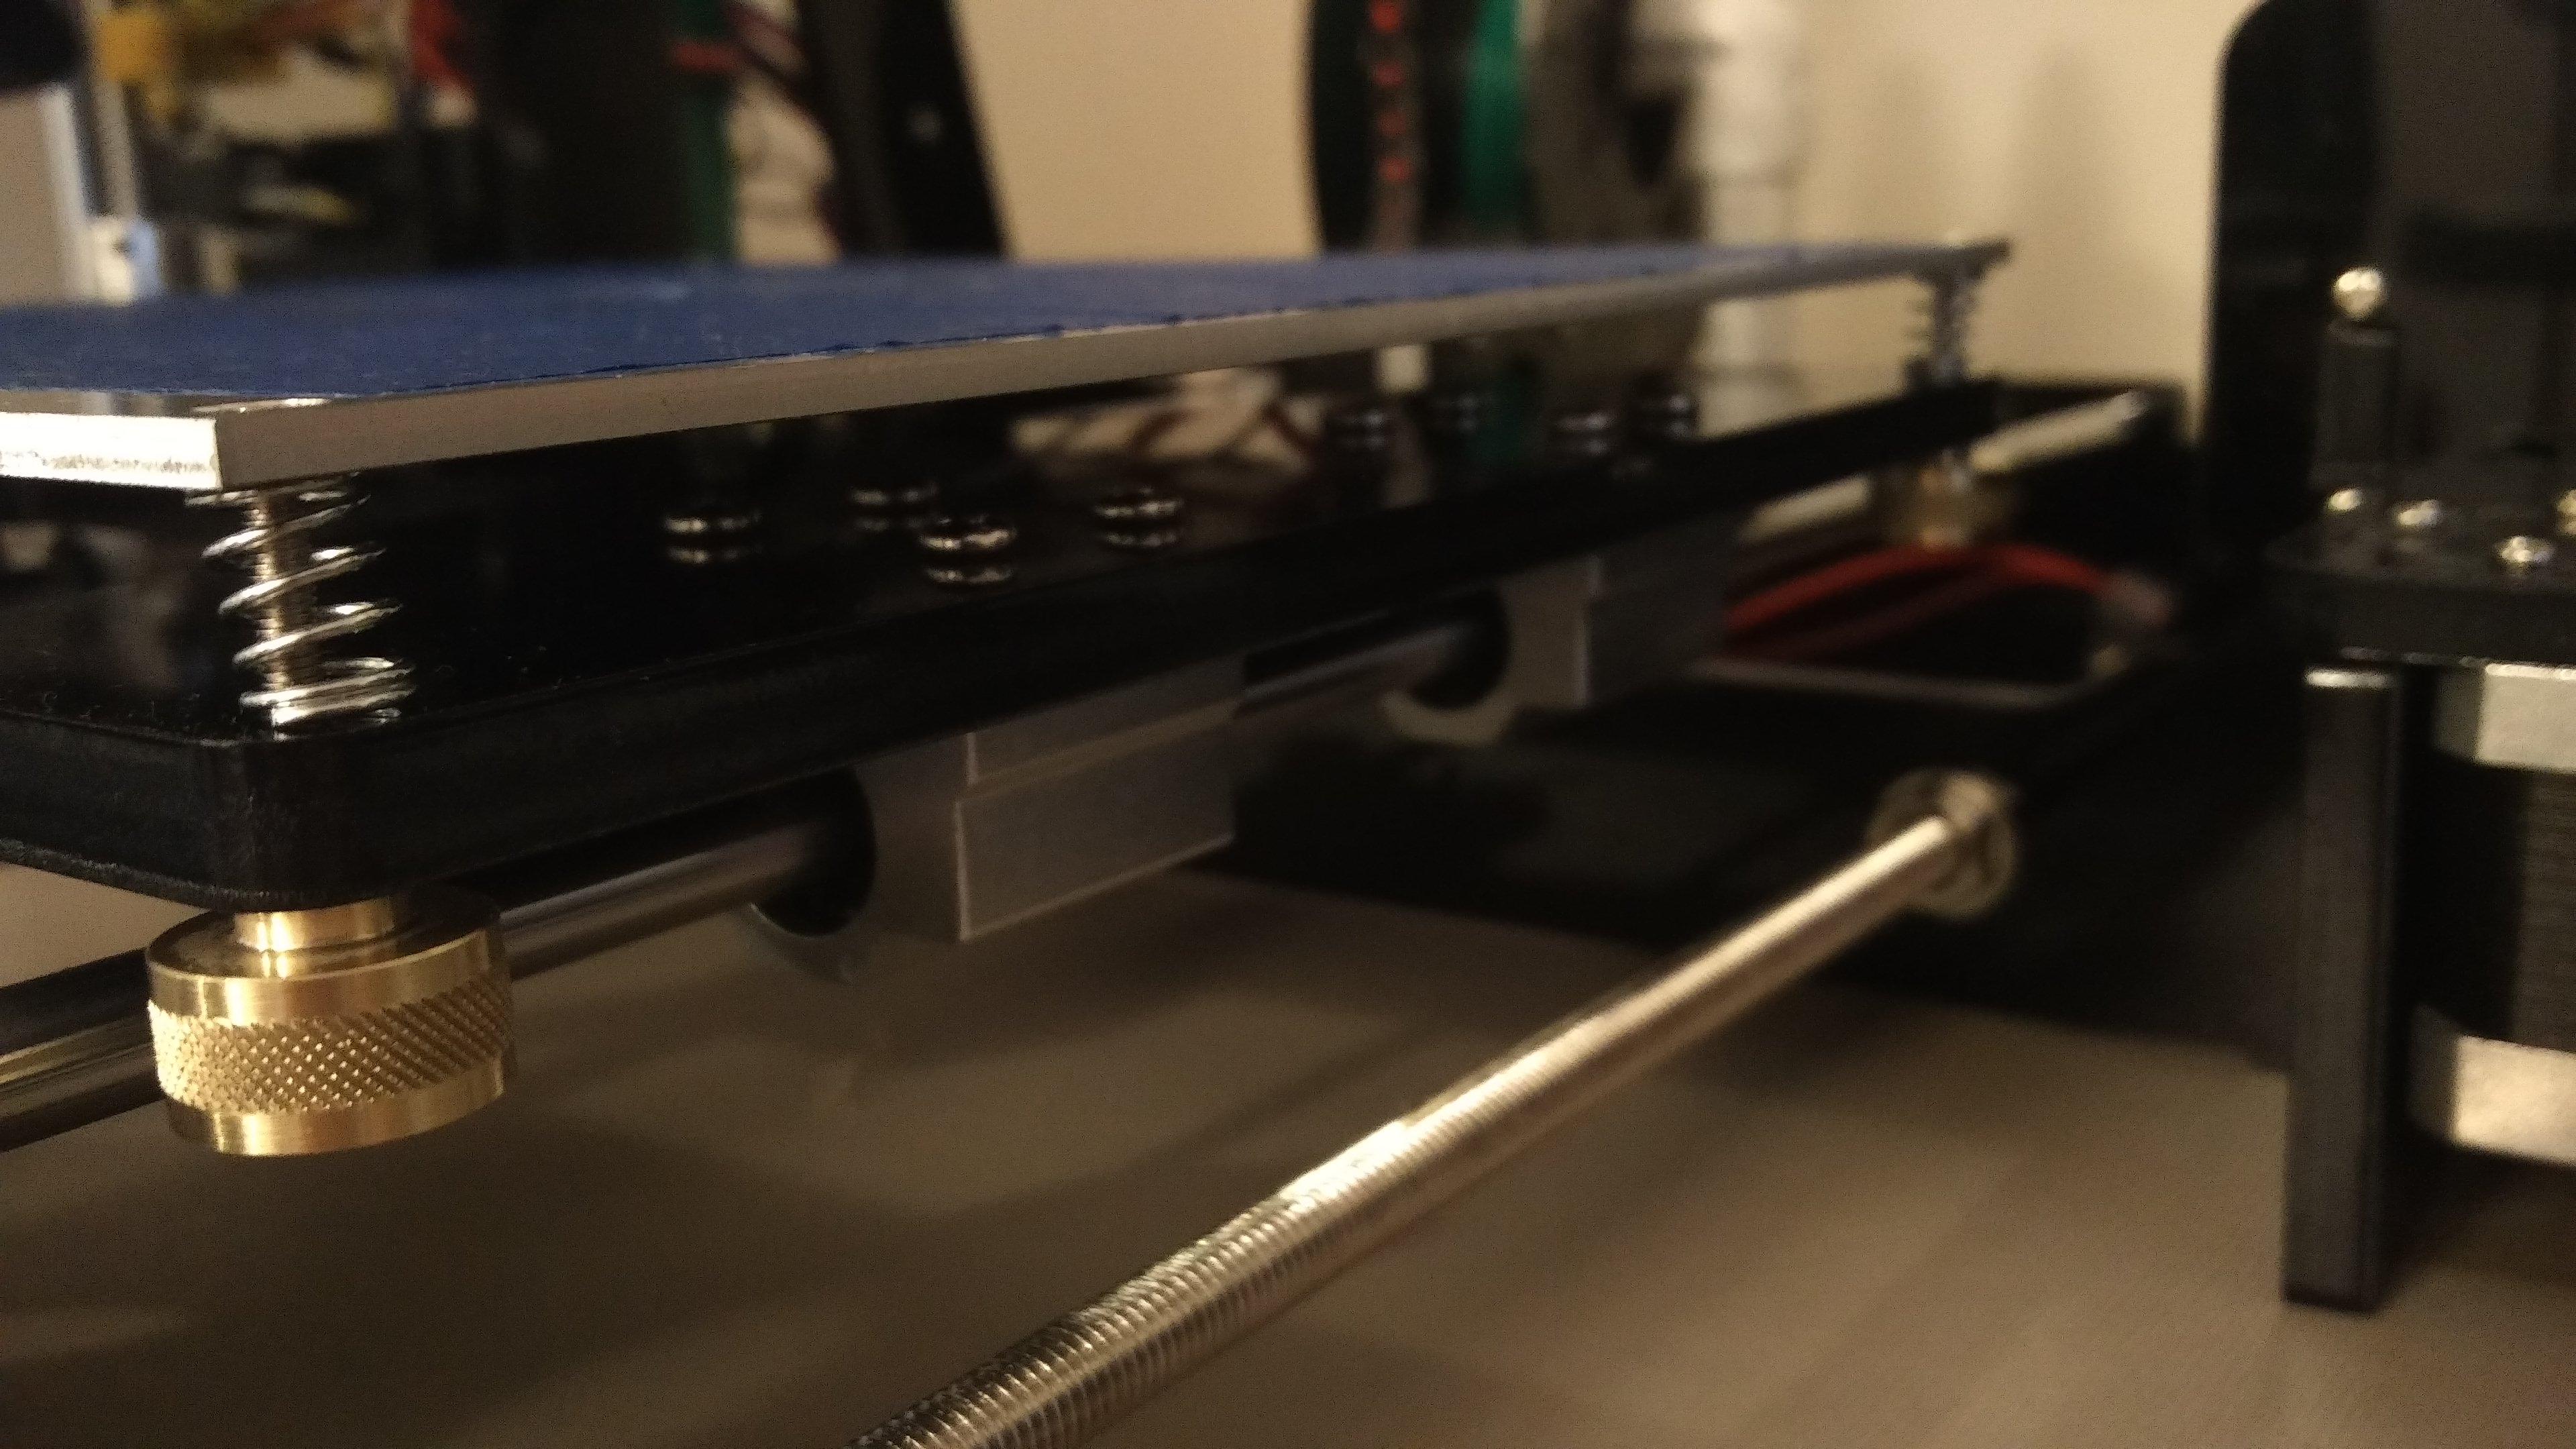
The dimensions were based off a wingnuts diameter (wing span?) and thickness. I was extra careful that they were not so big that they would catch on the front and back of the frame while the Y axis moves about. I added a 2.5mm shoulder at 7.94mm diameter so that after cutting off I could hold the part in a 5/16″ collet and face it off as needed but the cutoff finish was good enough that it was not necessary. The drawing is below, please excuse the crudity as it is not my specialty. All units are in millimeters, using the 3D printer has forced me to switch to metric which makes interfacing with my CNC lathe that uses imperial fun. Yay for unit conversion!

After an hour or so and my first experience with knurling I ended up with four beautiful thumb screws. They glide effortlessly and prevent the bolt from binding at strange angles. Bed leveling has never been so easy.

View Other Related Tronxy P802M Articles.

Looking good! Now what are you making on your printer?
LikeLike